“This post contains affiliate links. Please read my disclosure policy for more information.”
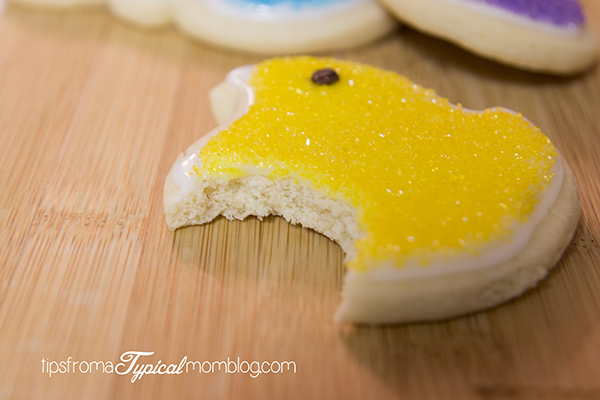
Peeps are my all time favorite Easter treat because of the yummy marshmallow center and super bright and colorful sugar they are coated in. Who would love that? I’m giving all of you “no sugar” eaters a heart attack aren’t I?
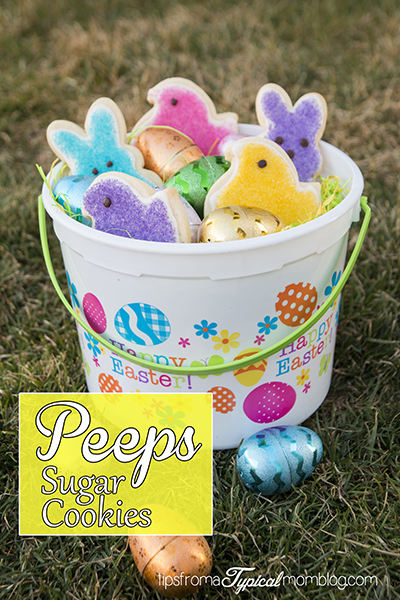
Well, these Peeps Sugar Cookies are the cutest Easter cookies I have ever made. You’ll love them too.

I substituted the almond extract for coconut extract in the cookies to give them a fresh “springy” taste.
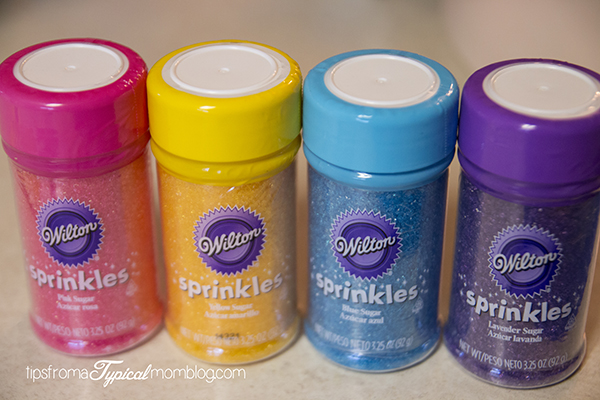
Wilton made it easy for me to make these look just like real Peeps with the perfect colored sugars and Peeps cookie cutters.
I found the sugars and cookie cutters at Wal-Mart. I’m sure you’ve seen the displays towards the front of the stores. Or you can get them through Amazon HERE.

You can find these on Amazon HERE and HERE.
Easter Peeps Sugar Cookies
3 c unbleached, all-purpose flour
2 tsp baking powder
1 c sugar
2 sticks butter, room temperature
1 egg
3/4 tsp pure vanilla extract
1/2 tsp pure coconut extract
2 tablespoons of semi sweet chocolate chips
Peeps cookie cutters
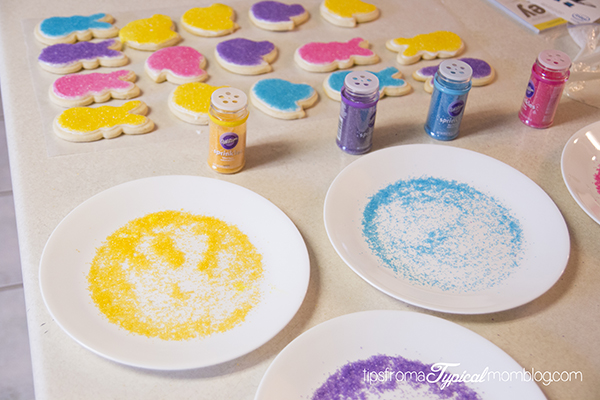
Colored Sugar- Yellow, Pink, Blue and Purple
Ingredients for royal icing:
1 Cup Confectioners Sugar
2 teaspoons milk
2 teaspoons corn syrup
1/4 teaspoon almond extract
Food coloring of your choice
Ziplock bags
Toothpicks
Instructions:
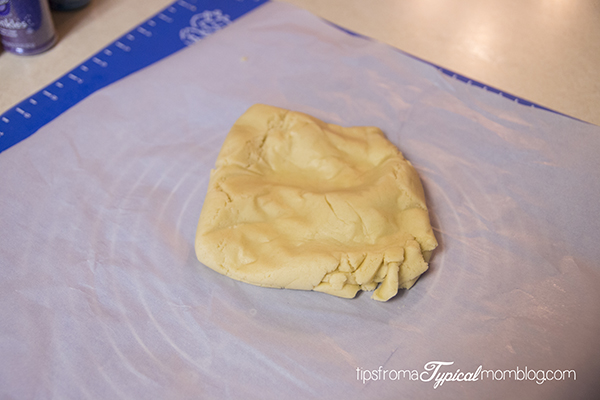
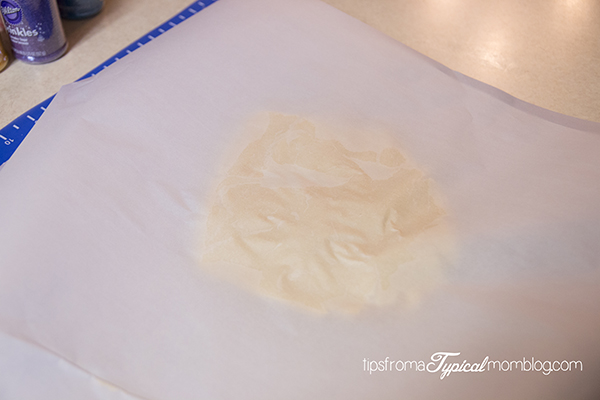
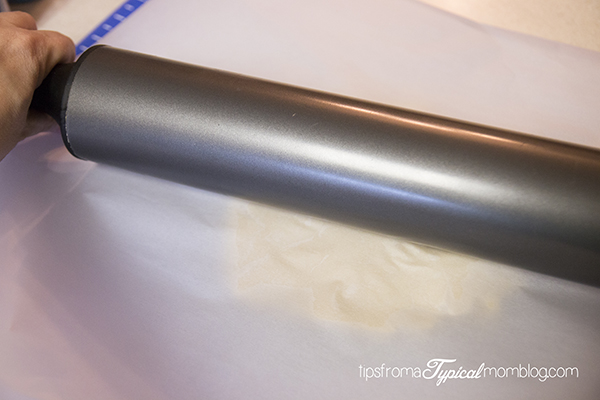
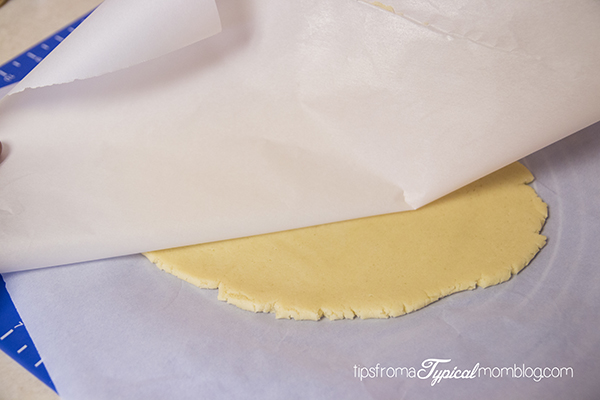
Preheat oven to 350. Combine the flour and baking powder, set aside. Cream the sugar and butter in a stand mixer or with a hand mixer. Add the egg and extracts and mix. Gradually add the flour mixture and beat until combined.Roll on a floured surface to about 1/4″ to 3/8″ thick, and cut into shapes. **I use parchment paper placed on a silicone mat, then parchment paper on top to roll out my dough so I don’t need to use extra flour. (See Pictures or watch my YouTube video.)**
Place dough on parchment paper on silicone mat so it doesn’t slip:
Place a layer of parchment paper on top of dough:
Roll dough out:
Lift parchment paper up:
And you have the perfect rolled out dough without any extra flour!
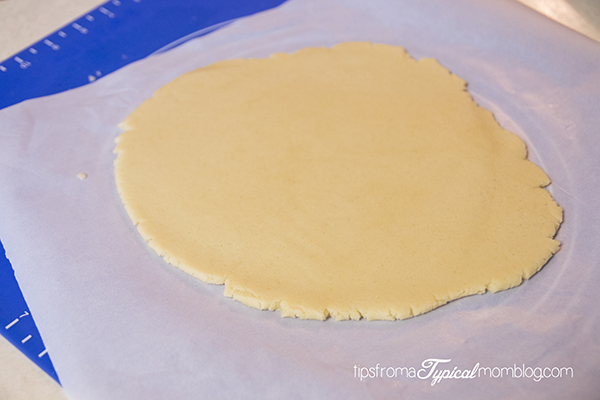
Now it’s ready to cut. Dip the cutters in flour before cutting if they stick to the dough.
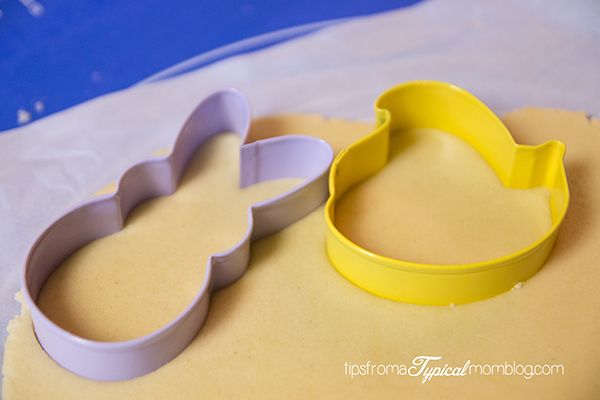
Place on parchment lined baking sheets.

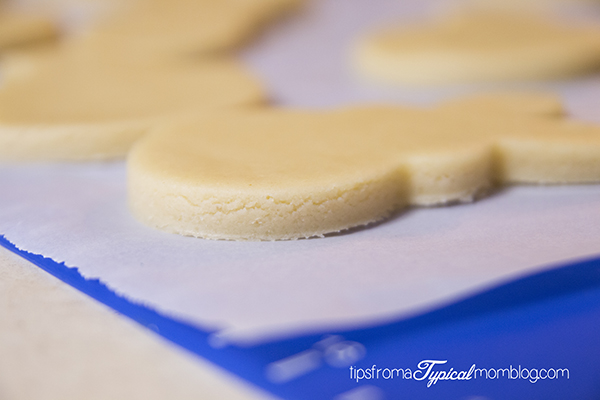
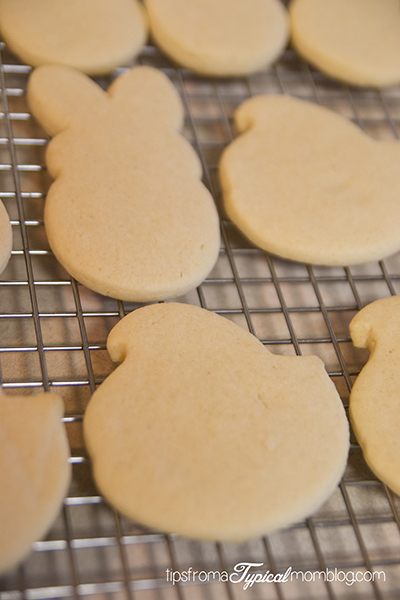
Freeze the cookie cut outs in the freezer for about 5 minutes before baking so the cookies hold their shape better. Bake for 10-12 minutes. Let rest a few minutes on the sheet, then transfer to a cooling rack.
Now for the fun stuff! Decorating them. Make my royal icing recipe which calls for no egg whites or meringue powder. This recipe will make the exact amount of icing you’ll need for these cookies. Make sure it’s thicker than syrup and honey and put it in a sandwich size zip top bag. I use a cup to help me do this. Watch this video to find out how I use the cup to fill the bag.
Royal Icing:
Add confectioners sugar to a mixing bowl or to your stand mixer and with a wire whisk start mixing on low. Add the milk, corn syrup and almond extract and whip until smooth. Add more corn syrup if the icing is too thick to use, but be sure to not make it too runny or it will run right off the cookies. It needs to be pretty thick to begin with if you are doing an outline around your cookies.
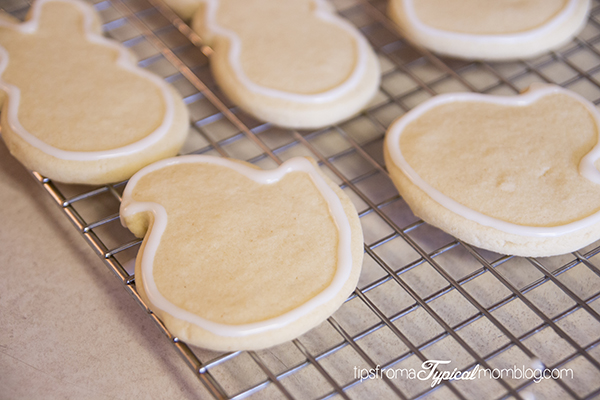
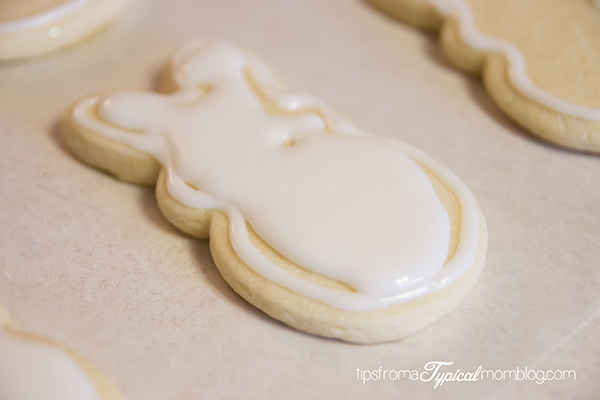
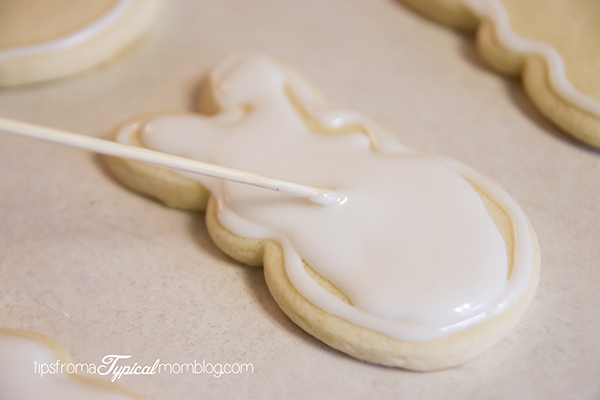
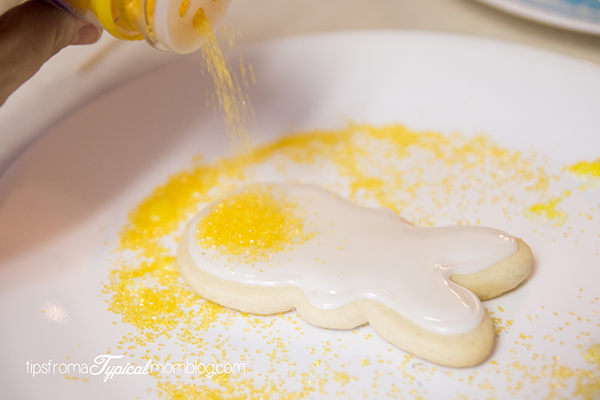
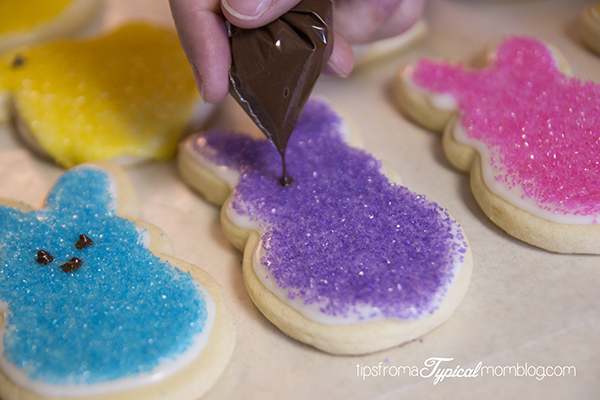
Separate the icing into different bowls for (ONLY if you are coloring with food coloring, but for this recipe we are leaving it white). Pour the icing into a zip lock bag and cut a tiny hole in the corner of the bag. Using the thick frosting, outline your cookies and let the frosting sit about 10 minutes to slightly harden. After lining your cookies with the thicker frosting, add a tiny bit of corn syrup to the frosting to thin it out just a bit, and mix well by kneading the bag, holding the hole shut with one hand. Fill the middle of the cookies with icing and using a toothpick, spread the frosting to fill in all the holes. (see more detailed instructions below with images). Sprinkle with colored sugar if desired. Let the cookies sit at room temperature on your kitchen counter until the icing has hardened all the way. Once the icing is hard to the touch, you may stack the cookies to package up or store. Store at room temperature for up to one week.
Outline the shape of the Peeps and let the icing harden for about 10 minutes.
Now fill the middle of the cookie with icing and spread with a toothpick or a bamboo skewer.
DON’T ADD TOO MUCH ICING OR THIS WILL HAPPEN: Oops!
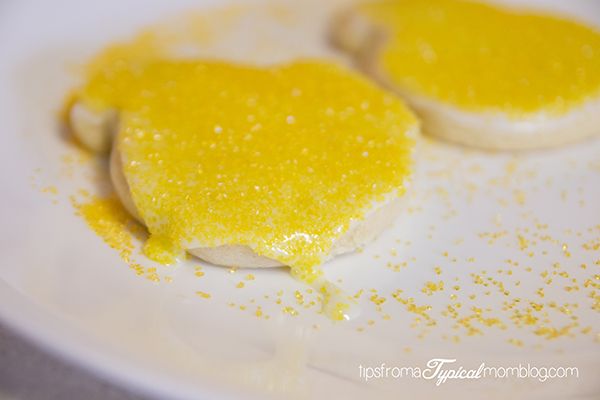
While the icing is still wet, sprinkle the sugar on it and quickly lift and tip to let the excess sugar fall off. I do this over 4 different plates for each sugar color.
Let the icing harden for about 30 minutes then move on to making the eyes. Add the chocolate chips to a microwaveable safe cup and microwave for 30 seconds.
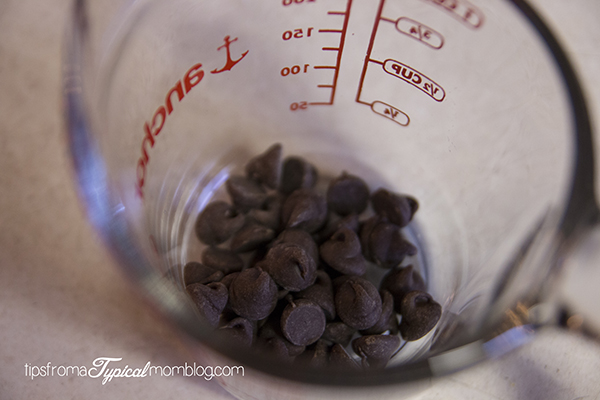
Stir, and if not melted all the way through, microwave for 10 seconds at a time until smooth. Add to another plastic bag and cut a very tiny tip off the corner.
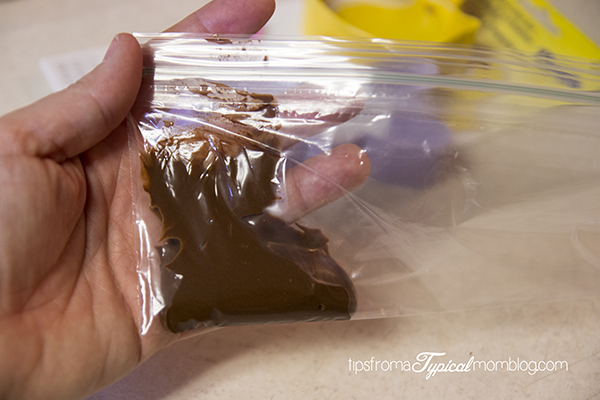
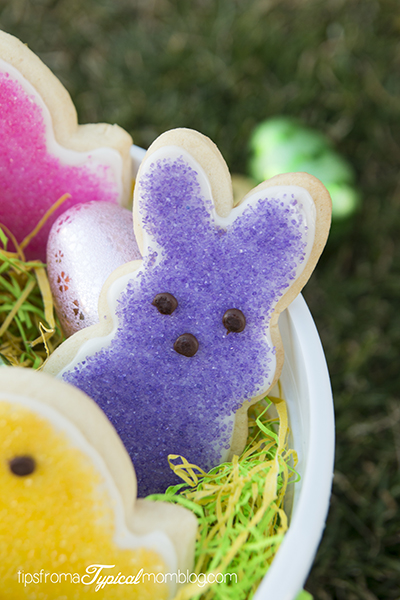
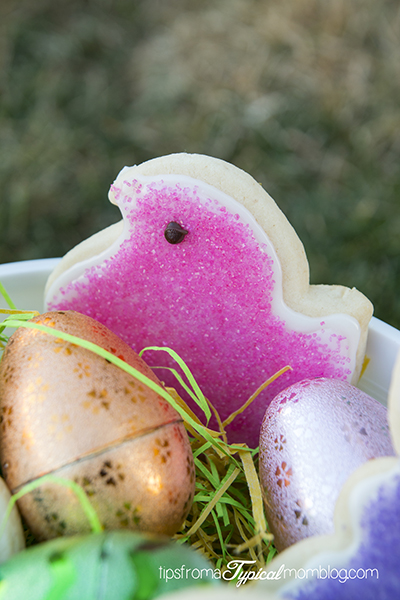
Make small little chocolate dots where the eyes and noses for the bunny’s would be and one dot on the chicks for one eye.
With a wet finger, gently press down the “Hershey’s kiss” points on the chocolate eyes and noses. I just used a cup of water to dip my finger in. Don’t use too much water though, just enough to keep your finger from sticking to the chocolate.


I hope you enjoy these as much as my family did.

Here is a printable version of the recipe.
Ingredients
- 3 c unbleached, all-purpose flour
- 2 tsp baking powder
- 1 c sugar
- 2 sticks butter, room temperature
- 1 egg
- 3/4 tsp pure vanilla extract
- 1/2 tsp pure coconut extract
- 2 tablespoons of semi sweet chocolate chips
- Peeps cookie cutters
- Colored Sugar- Yellow, Pink, Blue and Purple
- Ingredients for royal icing:
- 1 Cup Confectioners Sugar
- 2 teaspoons milk
- 2 teaspoons corn syrup
- 1/4 teaspoon almond extract
- Food coloring of your choice
- Ziplock bags
- Toothpicks
Instructions
- Preheat oven to 350.
- Combine the flour and baking powder, set aside.
- Cream the sugar and butter in a stand mixer or with a hand mixer.
- Add the egg and extracts and mix.
- Gradually add the flour mixture and beat until combined.
- Roll on a floured surface to about 1/4" to 3/8" thick, and cut into shapes.
- **I use parchment paper placed on a silicone mat, then parchment paper on top to roll out my dough so I don't need to use extra flour.
- Now it's ready to cut. Dip the cutters in flour before cutting if they stick to the dough.
- Place the cut dough onto cookie sheets that are lined with parchment paper or sprayed with non-stick spray.
- Freeze the cookie cut outs in the freezer for about 5 minutes before baking so the cookies hold their shape better.
- Bake for 10-12 minutes. Let rest a few minutes on the sheet, then transfer to a cooling rack.
- ROYAL ICING:
- Add confectioners sugar to a mixing bowl or to your stand mixer and with a wire whisk start mixing on low.
- Add the milk, corn syrup and almond extract and whip until smooth.
- Add more corn syrup if the icing is too thick to use, but be sure to not make it too runny or it will run right off the cookies. It needs to be pretty thick to begin with if you are doing an outline around your cookies.
- Separate the icing into different bowls for (ONLY if you are coloring with food coloring, but for this recipe we are leaving it white).
- Pour the icing into a zip lock bag and cut a tiny hole in the corner of the bag.
- Using the thick frosting, outline your cookies and let the frosting sit about 10 minutes to slightly harden.
- After lining your cookies with the thicker frosting, add a tiny bit of corn syrup to the frosting to thin it out just a bit, and mix well by kneading the bag, holding the hole shut with one hand.
- Fill the middle of the cookies with icing and using a toothpick, spread the frosting to fill in all the holes.
- Sprinkle with colored sugar if desired.
- Let the cookies sit at room temperature on your kitchen counter until the icing has hardened all the way.
- Once the icing is hard to the touch, you may stack the cookies to package up or store. Store at room temperature for up to one week.
- Now let's make the little eyes: Add the chocolate chips to a microwaveable safe cup and microwave for 30 seconds.
- Stir, and if not melted all the way through, microwave for 10 seconds at a time until smooth.
- Add to a plastic bag and cut a very tiny tip off the corner.
- Make small little chocolate dots where the eyes and noses for the bunny's would be and one dot on the chicks for one eye.
- With a wet finger, gently press down the points on the chocolate eyes and noses. I just used a cup of water to dip my finger in. Don't use too much water though, just enough to keep your finger from sticking to the chocolate.
- Let cookies sit at room temperature until chocolate and icing hardens.
- Enjoy!

What is your favorite Easter Candy?


These are adorable and look WAY better than peeps! 🙂
They were better than peeps Kendra~! Thanks!
These are so cute!! I just saw these sprinkles and cookie cutters at Walmart last night and I think I may have to go back and buy them.
Thanks Syndey! You should they were so fun to make!
These are SO adorable! I love the Wilton sprinkles you used. I need to get some of them!
Thanks Becky, I loved the bright colors of the sugar. They are on the same display as the cookie cutters towards the front of the WalMart store.
YUM! These look amazing. I know my daughter will get a kick out of making these. Can’t wait to do this for Easter!
These are so adorable! They look just like peeps!
I love the bright, pastel colors!!
Thanks Amberly, I knew I had to make these when I saw the colored sugars. They were perfect!
These are so dang cute! I am not a fan of marshmallow so these Peeps are definitely preferable to the normal ones!
Maria, you will love these as a replacement for Peeps!
So cute!!! Love how these turned out. They look yummy too!
Thanks Toni! They were fun to make!
I absolutely love peeps…i’m the only one in my house who does 🙂 I think these would make a wonderful alternative! So pretty!
Thanks Heather! I’m the only one in my house that likes them too!