Tips from a Typical Mom

Family, Food & Fun!

  • Recipes
    • Dinner
    • Soup
    • Salad
    • Bread
    • Appetizers
    • Beverages
    • Cakes
    • Cupcakes
    • Brownies
    • Desserts and Treats
    • Instant Pot
  • Parenting
    • Parenting Articles
    • Babies
    • Toddlers
    • Preschool
    • Teens
  • Holidays
    • New Years
    • Valentines Day
    • Saint Patrick’s Day
    • Spring
    • Easter
    • Mothers Day
    • Fathers Day
    • Summer
    • 4th of July
    • Fall
    • Back To School
    • Halloween
    • Thanksgiving
    • Winter
    • Christmas
  • Cleaning
    • Cleaning Tips
    • Organize
  • Travel
  • Personal Care
  • About
  • Favorite Products

DIY Easter Egg Candlesticks

04/01/14 | Crafts, Easter, Holidays

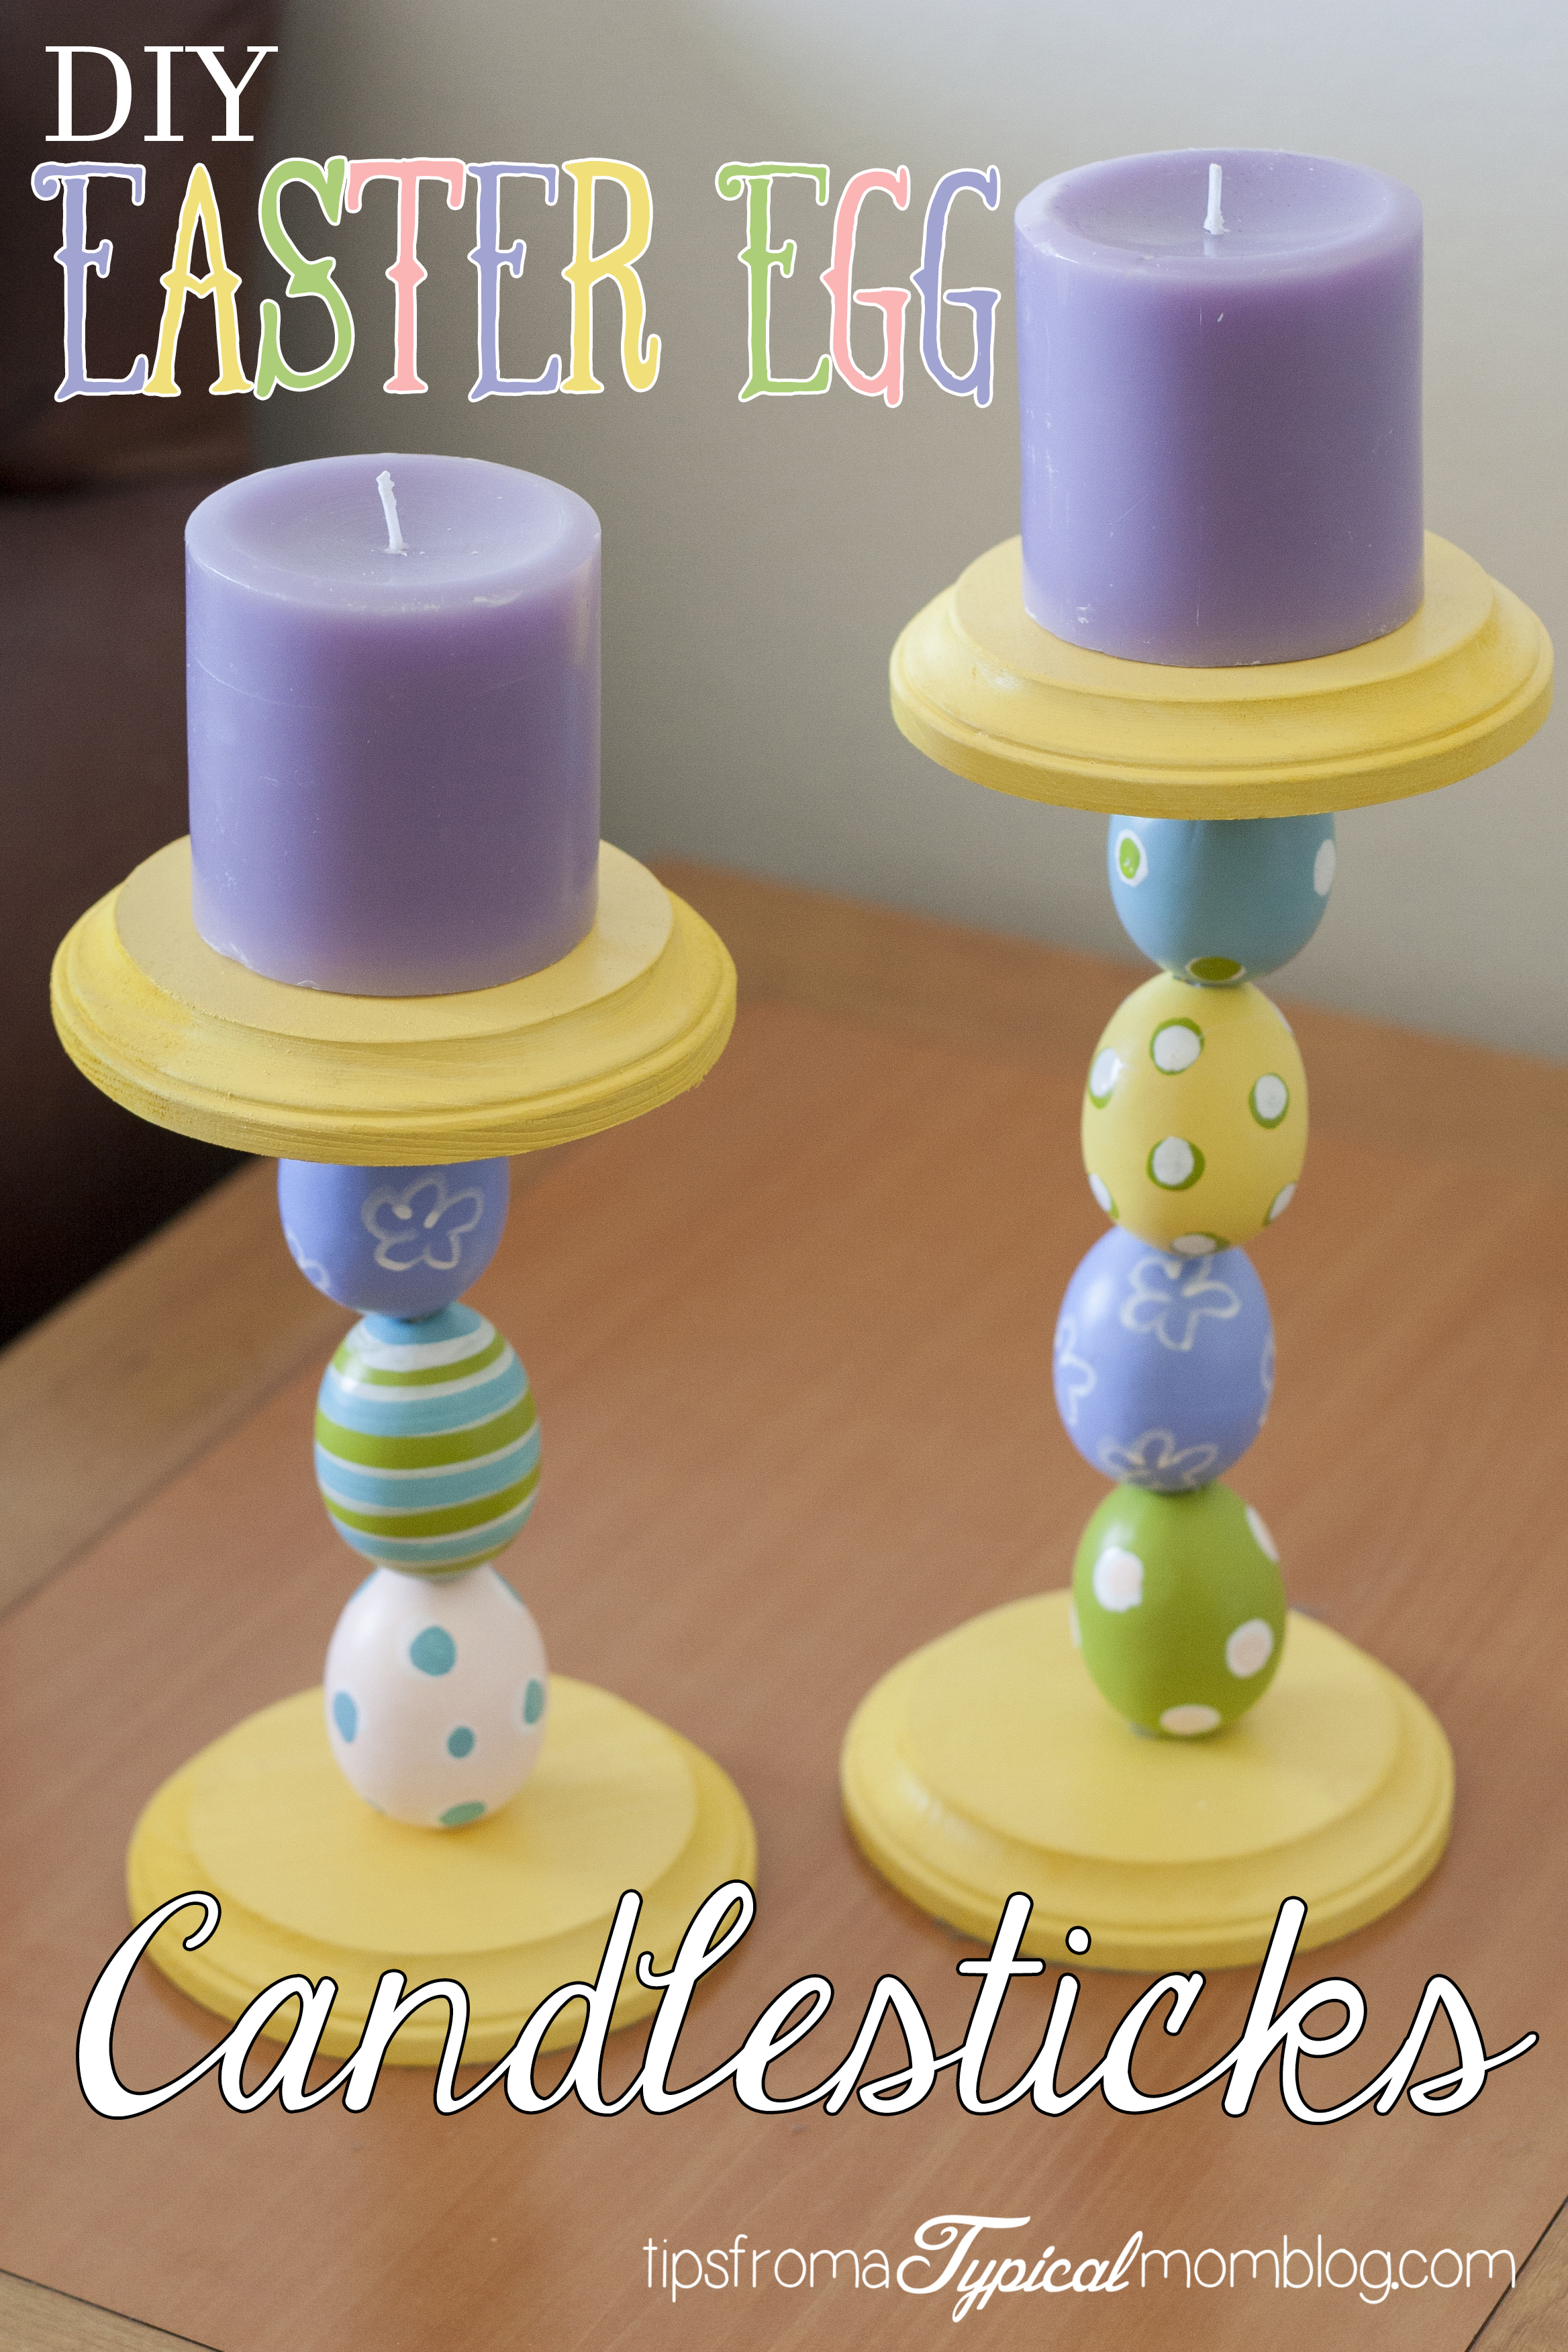
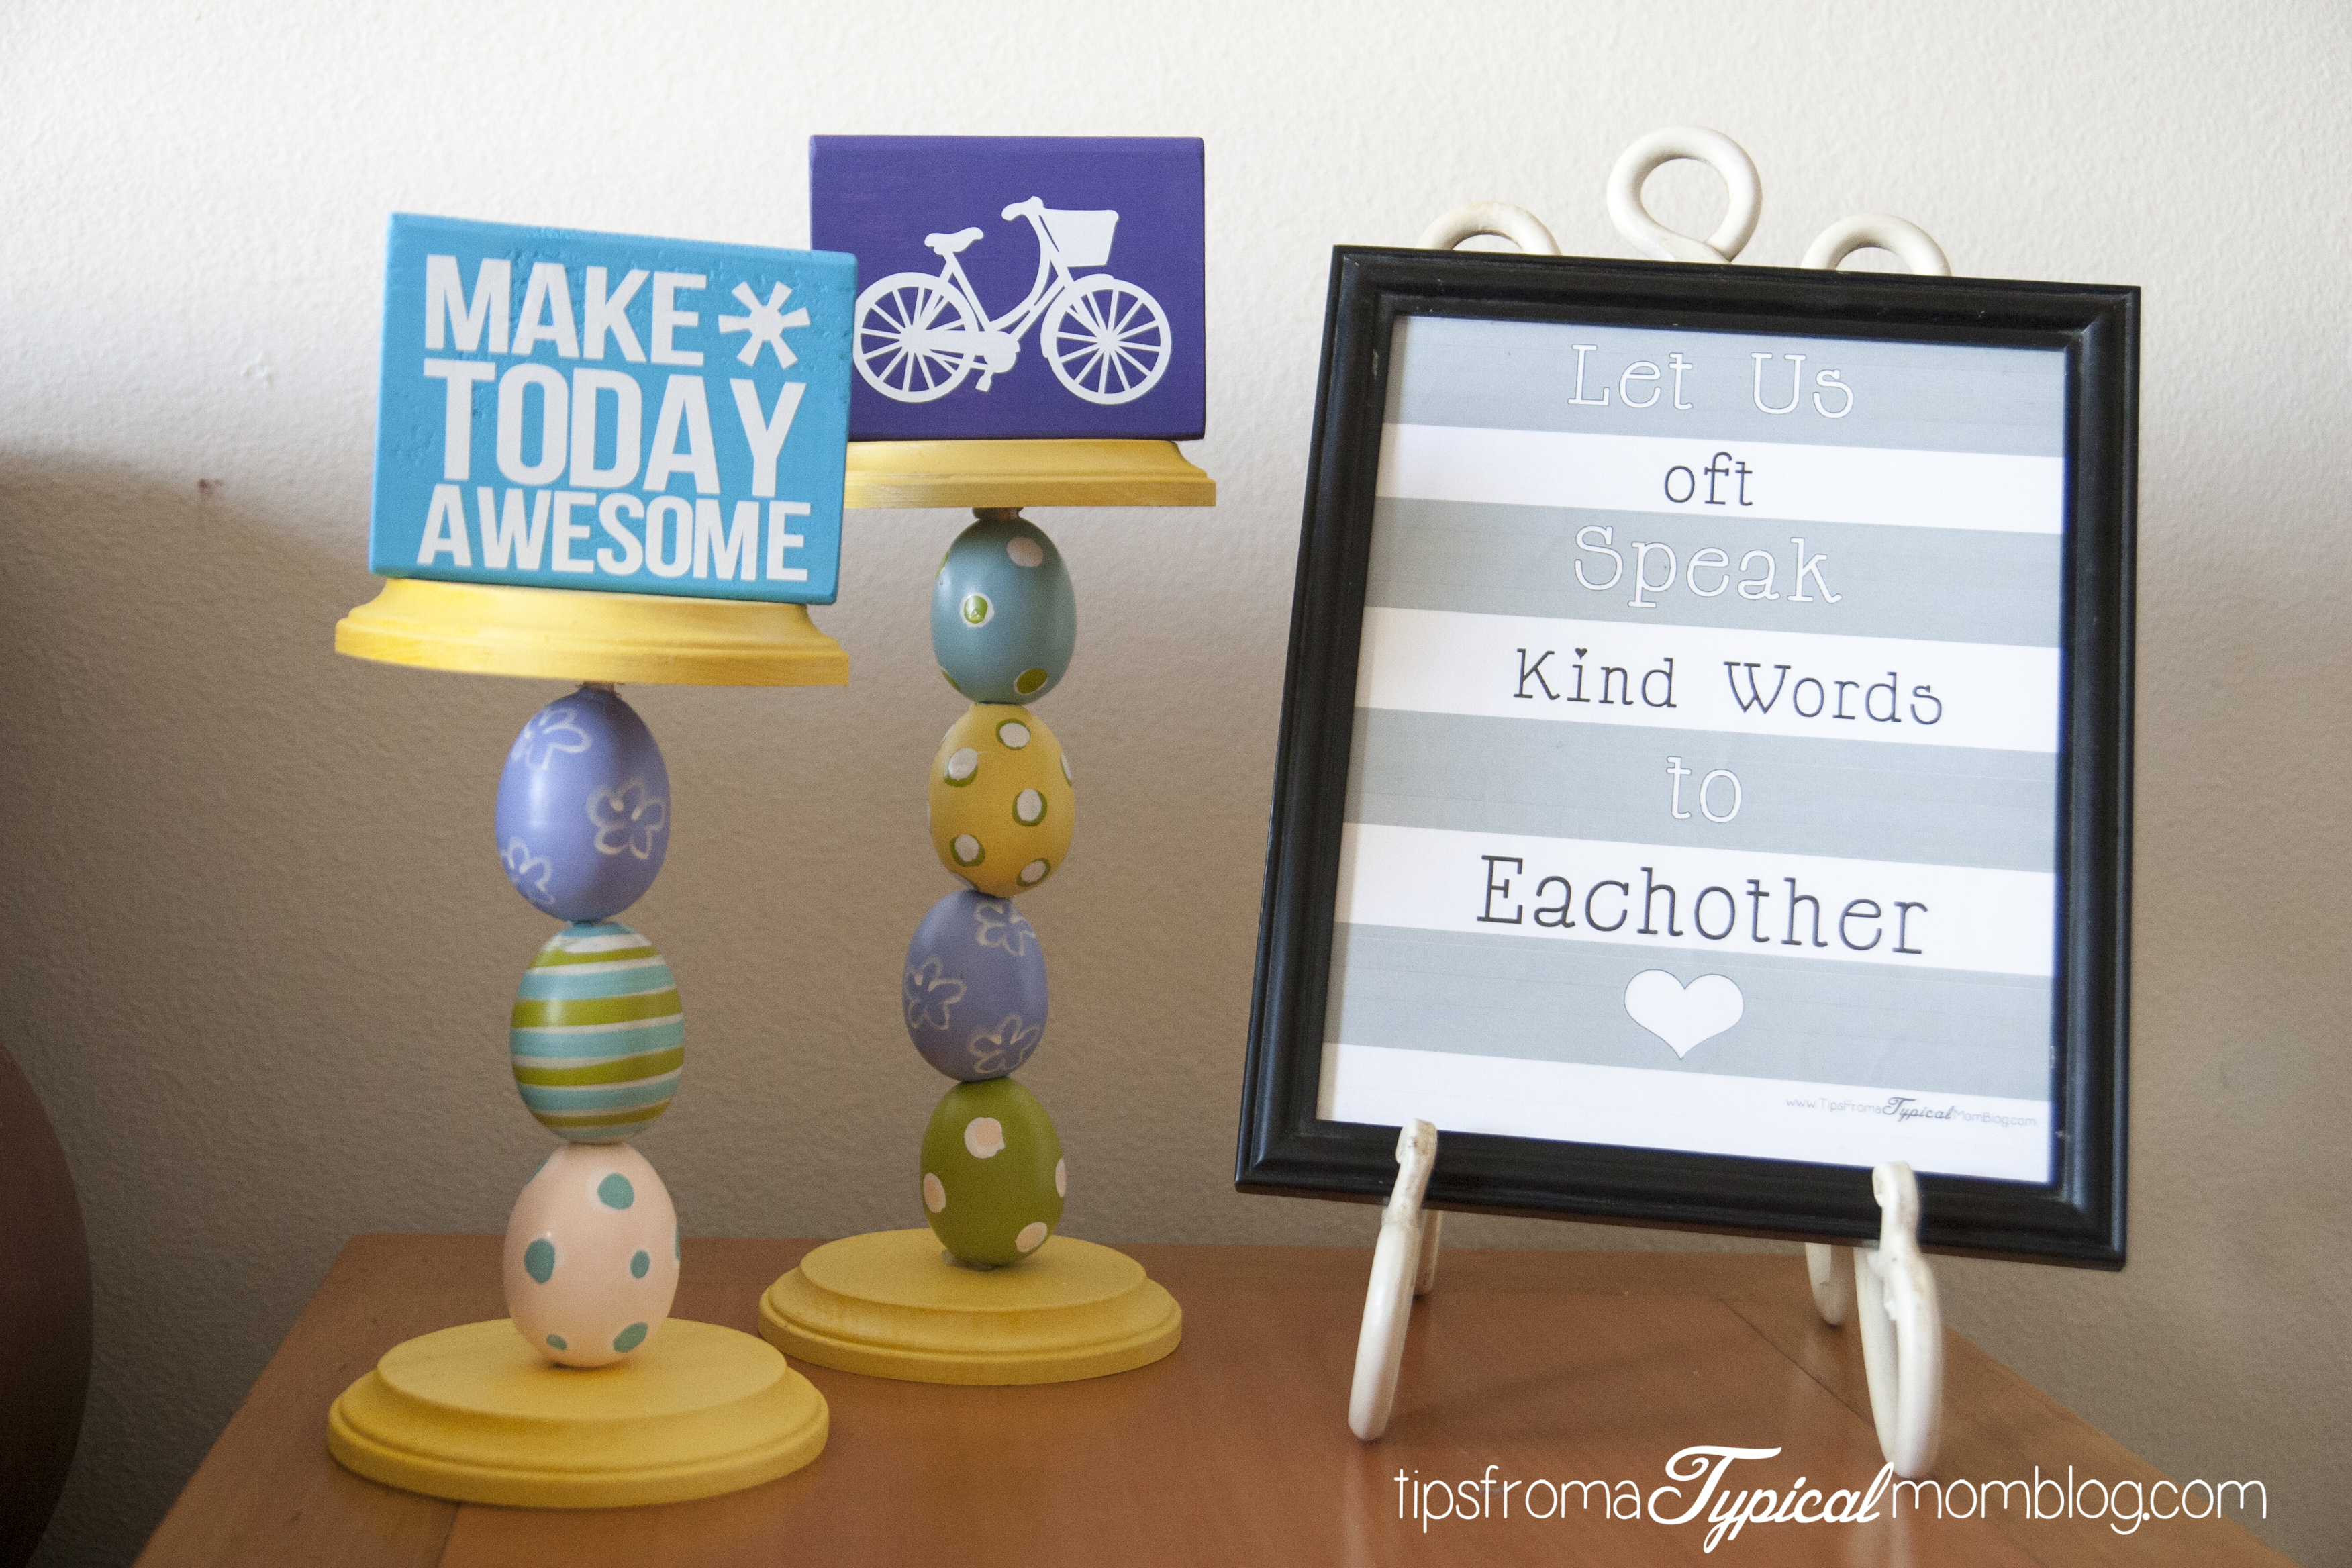
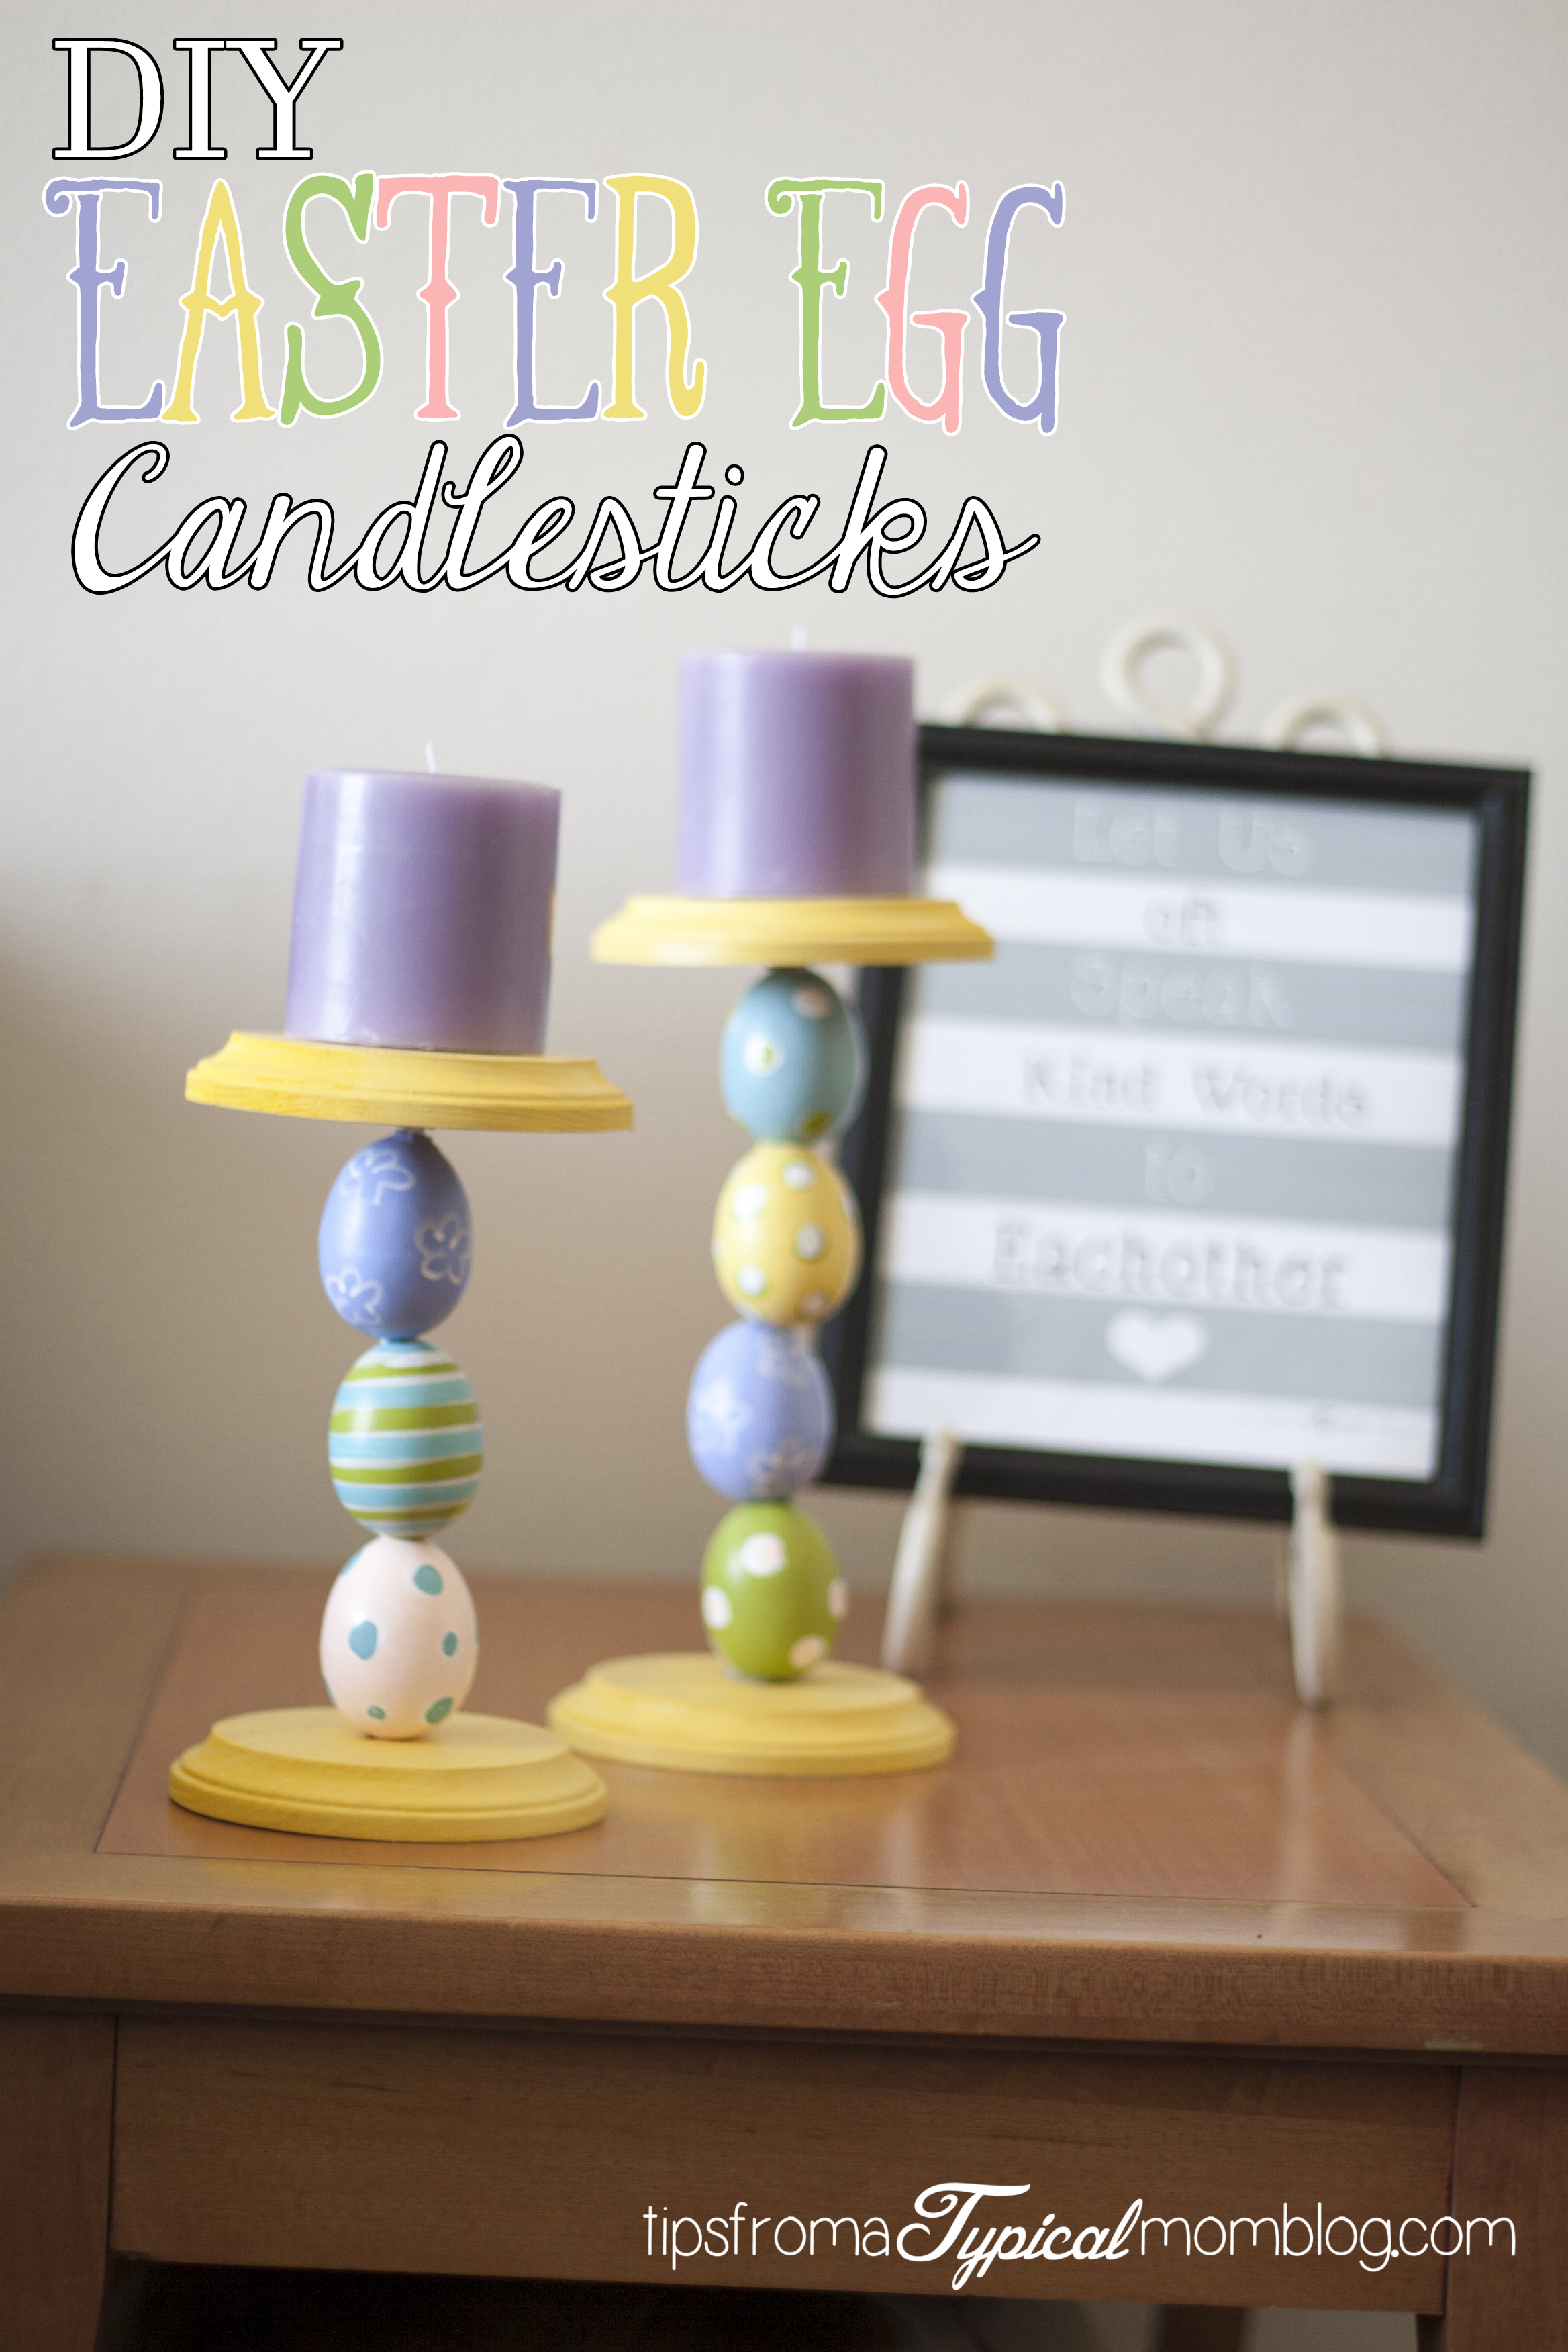
Easter is a fun time to add new colors and life to your home decor. These DIY Easter Egg Candlesticks are the perfect thing to add a little “Easter” to your home. They are fairly simple and come together quickly.

DIY Easter Egg Candlesticks from Tips From a Typical Mom


I purchased my foam eggs, dowel and wood rounds at Hobby Lobby. Here’s what you’ll need.

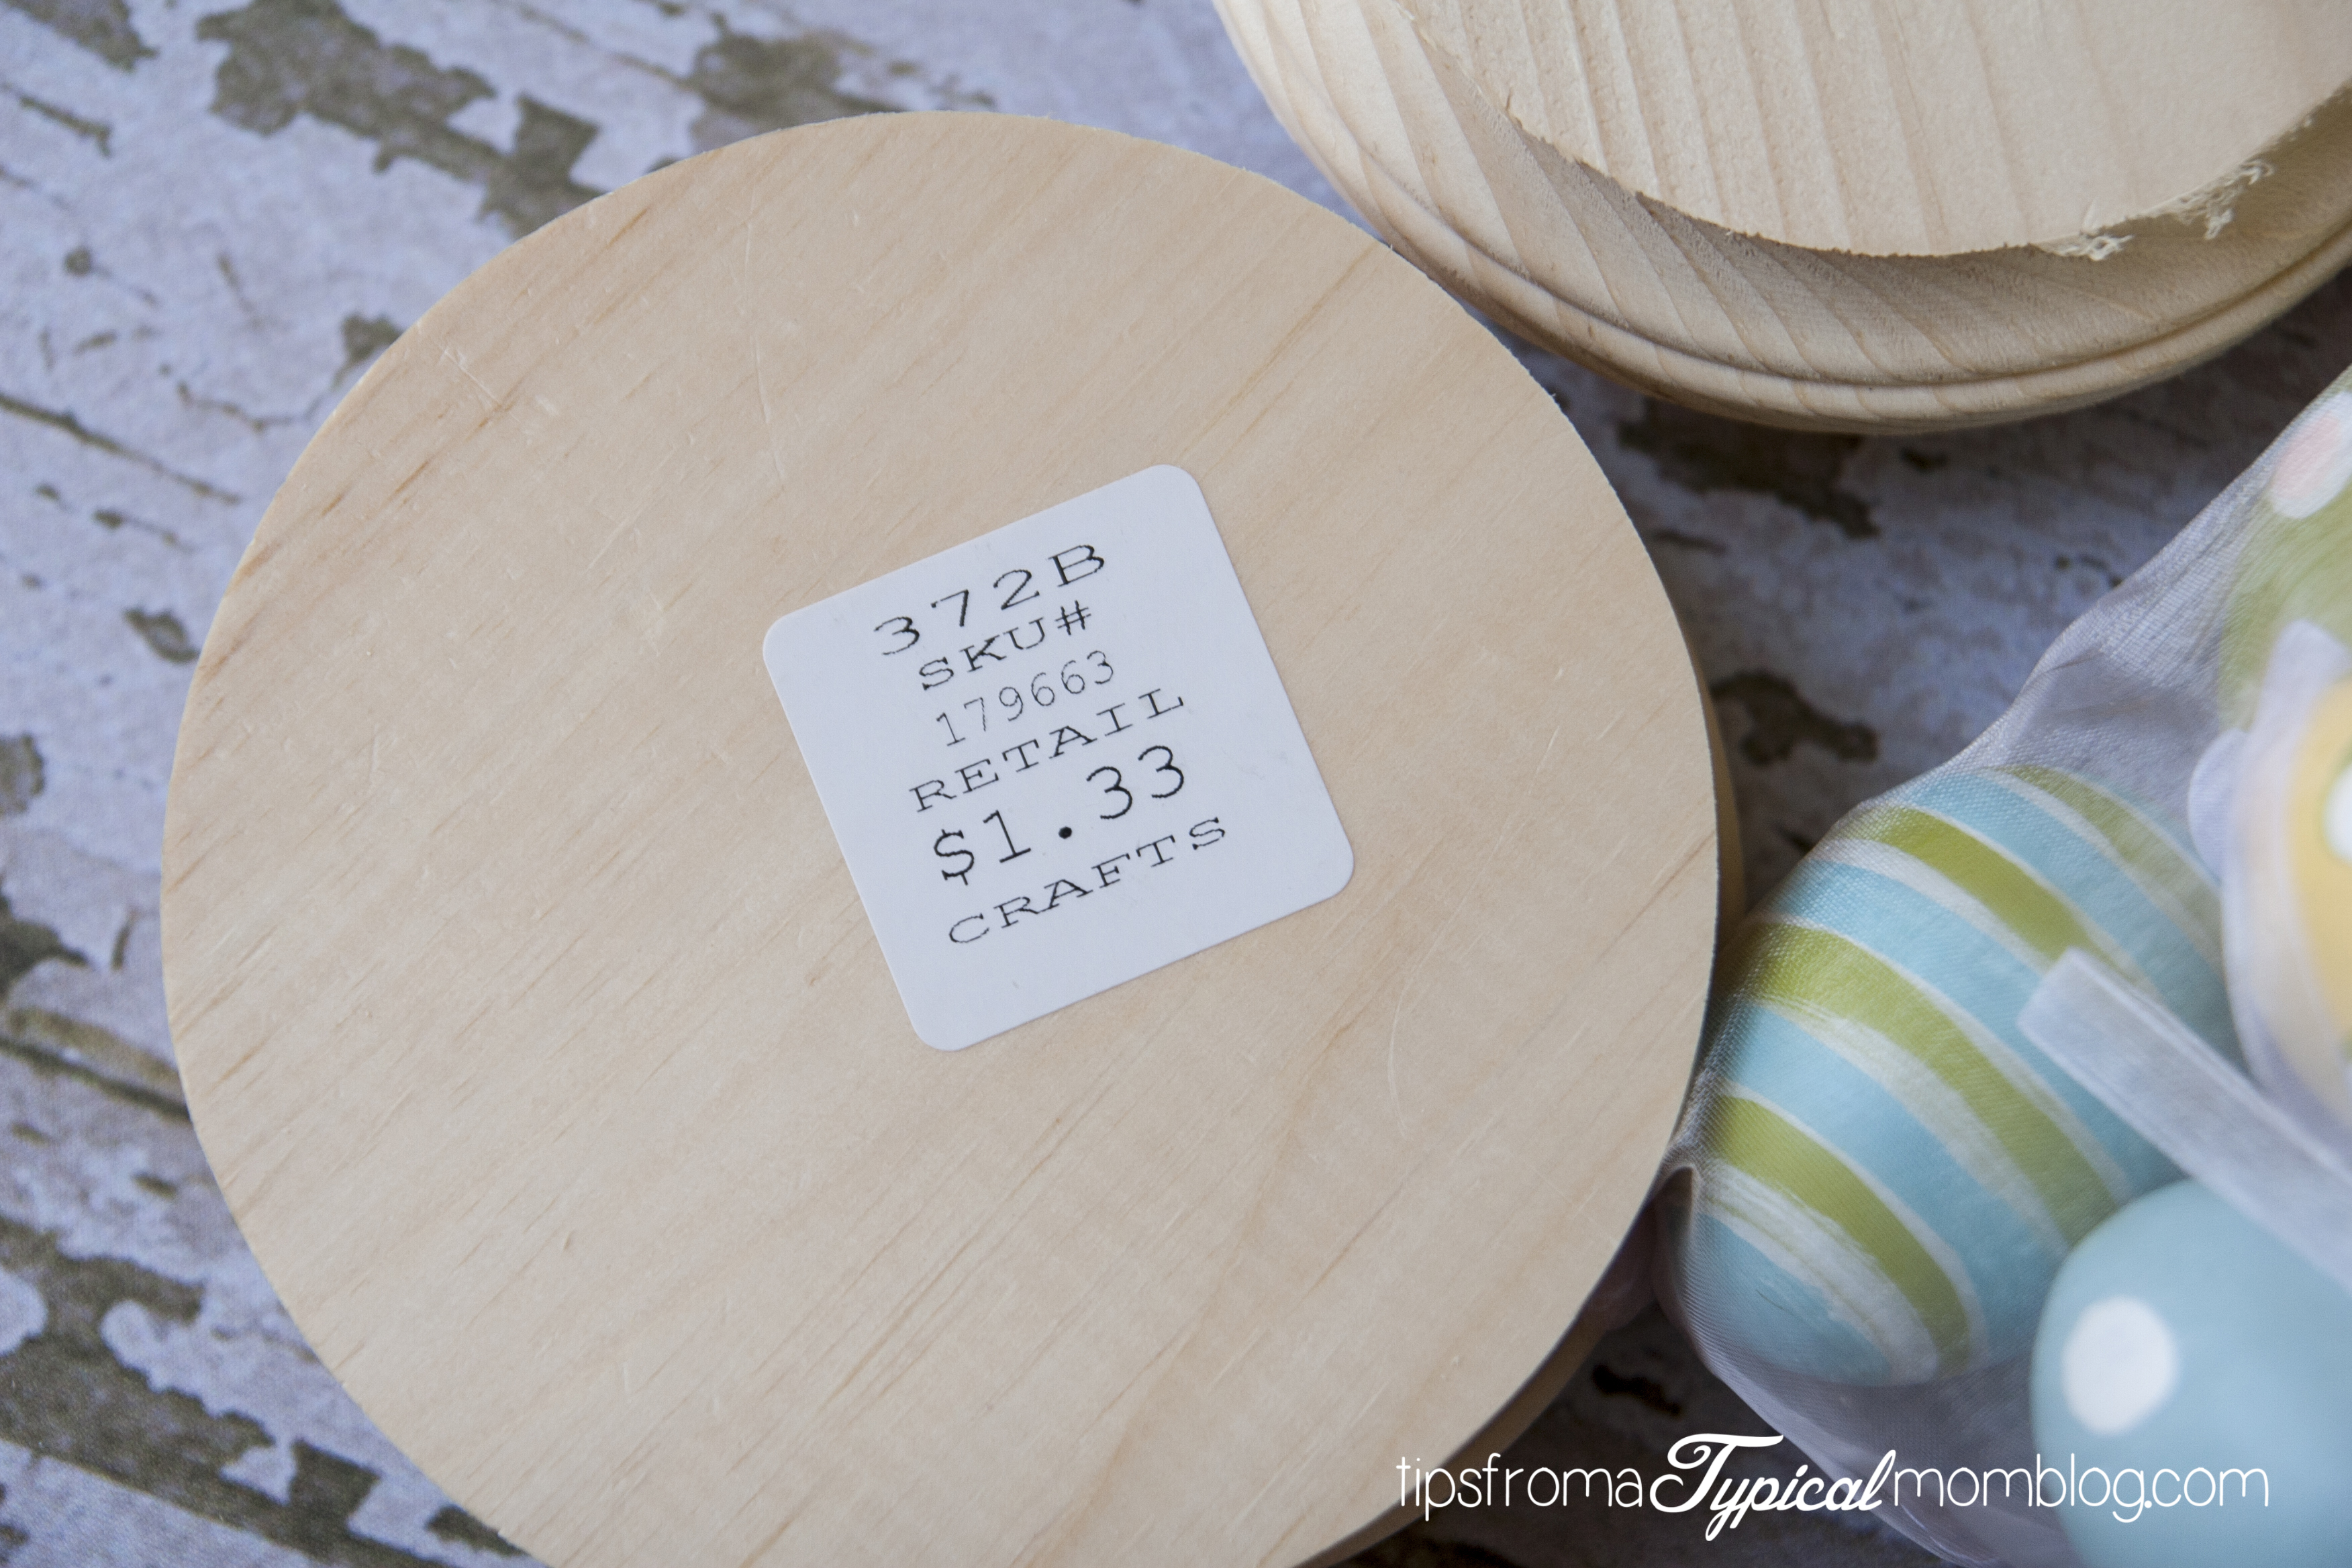
4 wood rounds @ $1.33 each

DIY Easter Egg Candlesticks from Tips From a Typical Mom

DIY Easter Egg Candlesticks from Tips From a Typical Mom

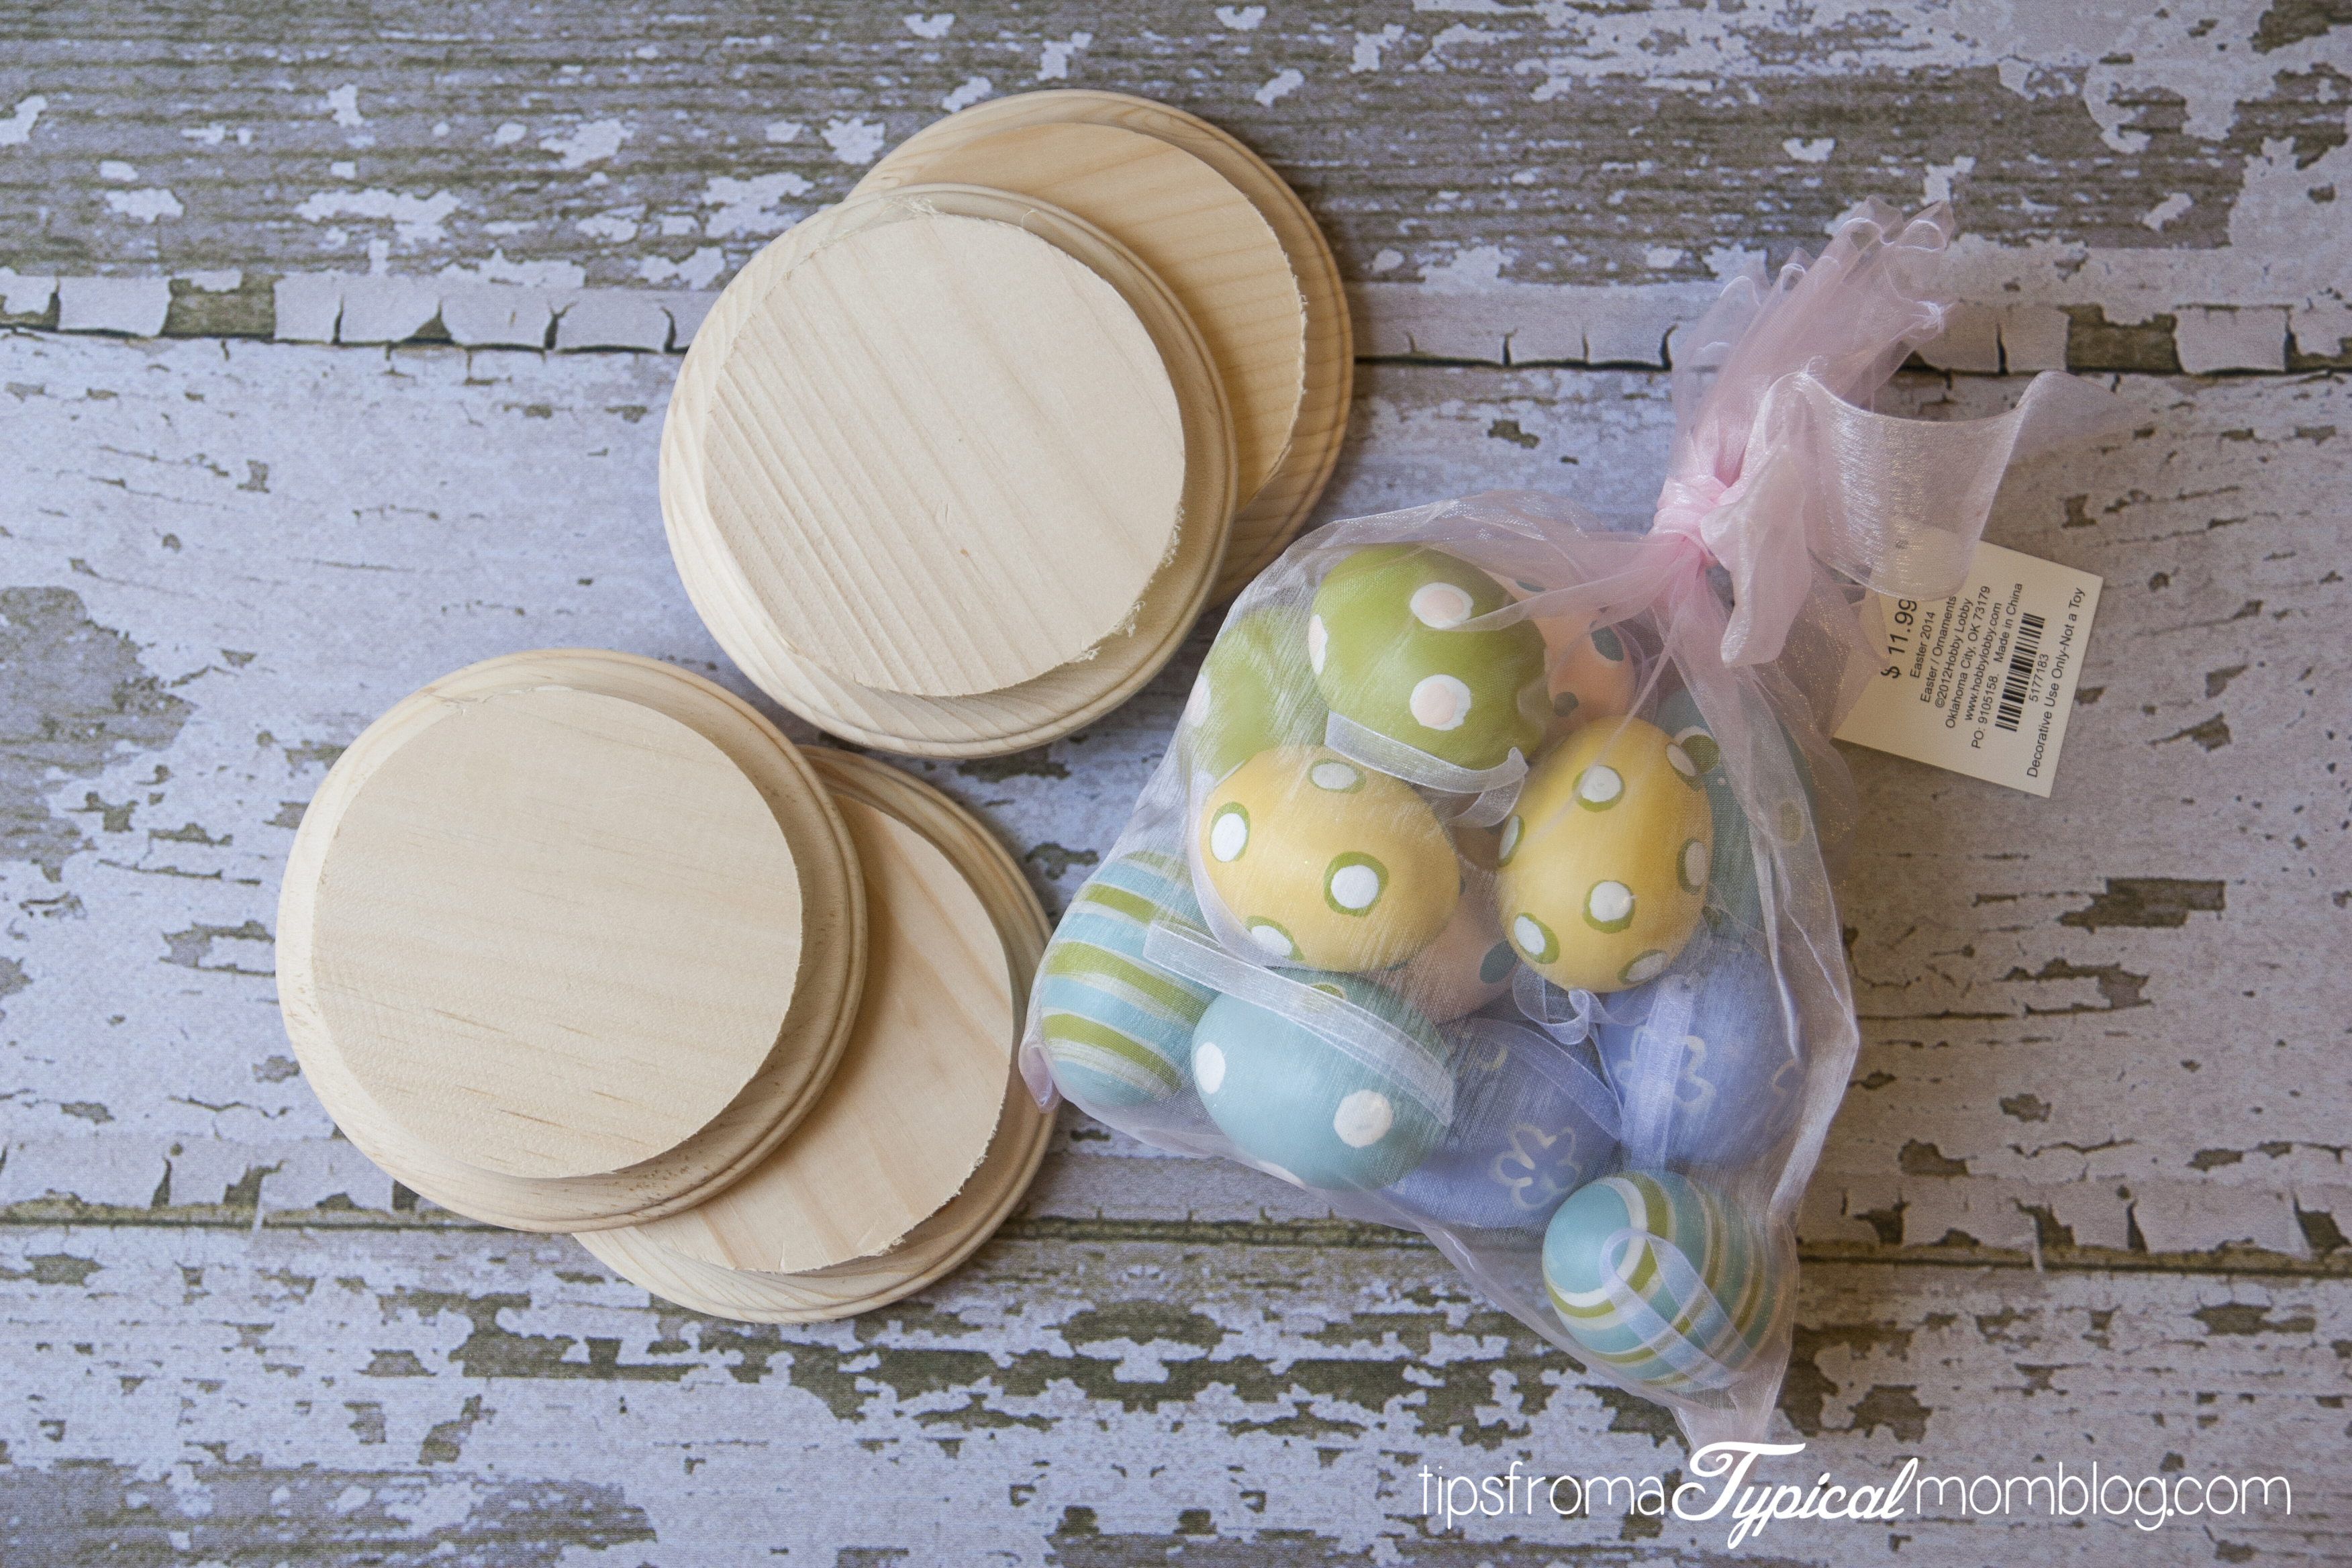
A bag of foam Easter Eggs @ $11.99 but you can use your 50% off coupon for these then they are only about $6.

DIY Easter Egg Candlesticks from Tips From a Typical Mom

A 5/8″ dowel, spray paint, hot glue, a ruler and a drill with a 5/8″ bit.

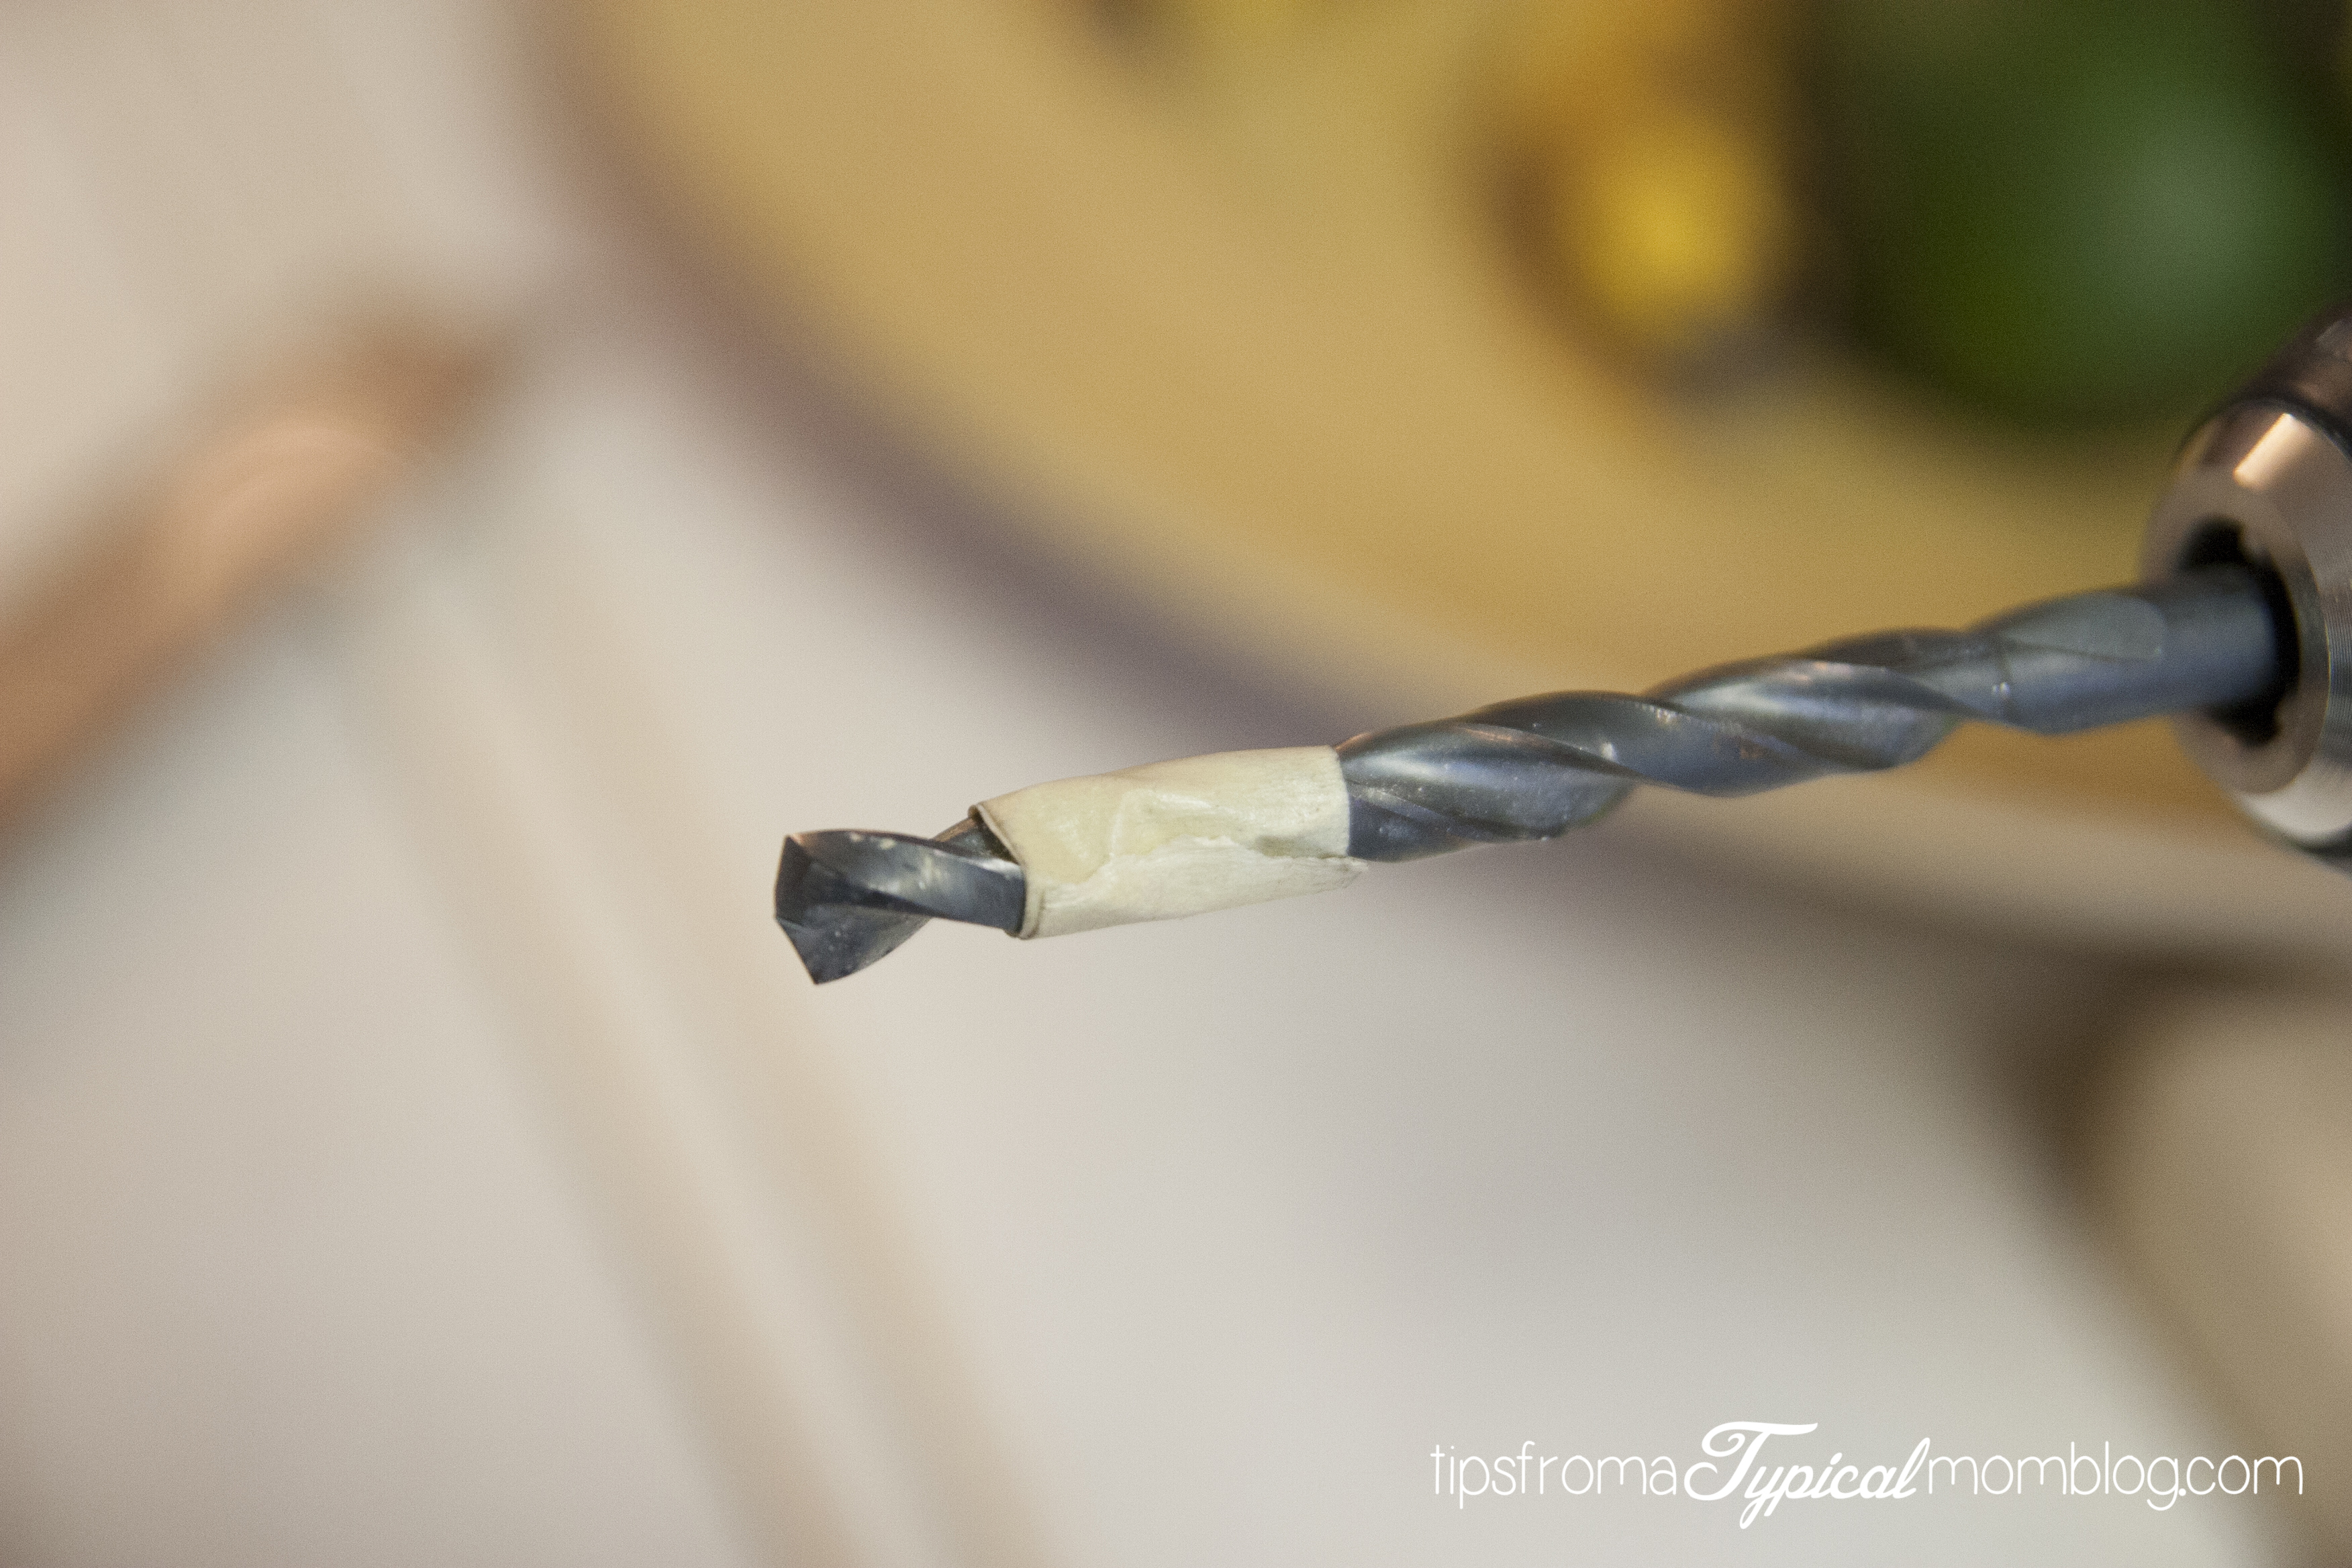
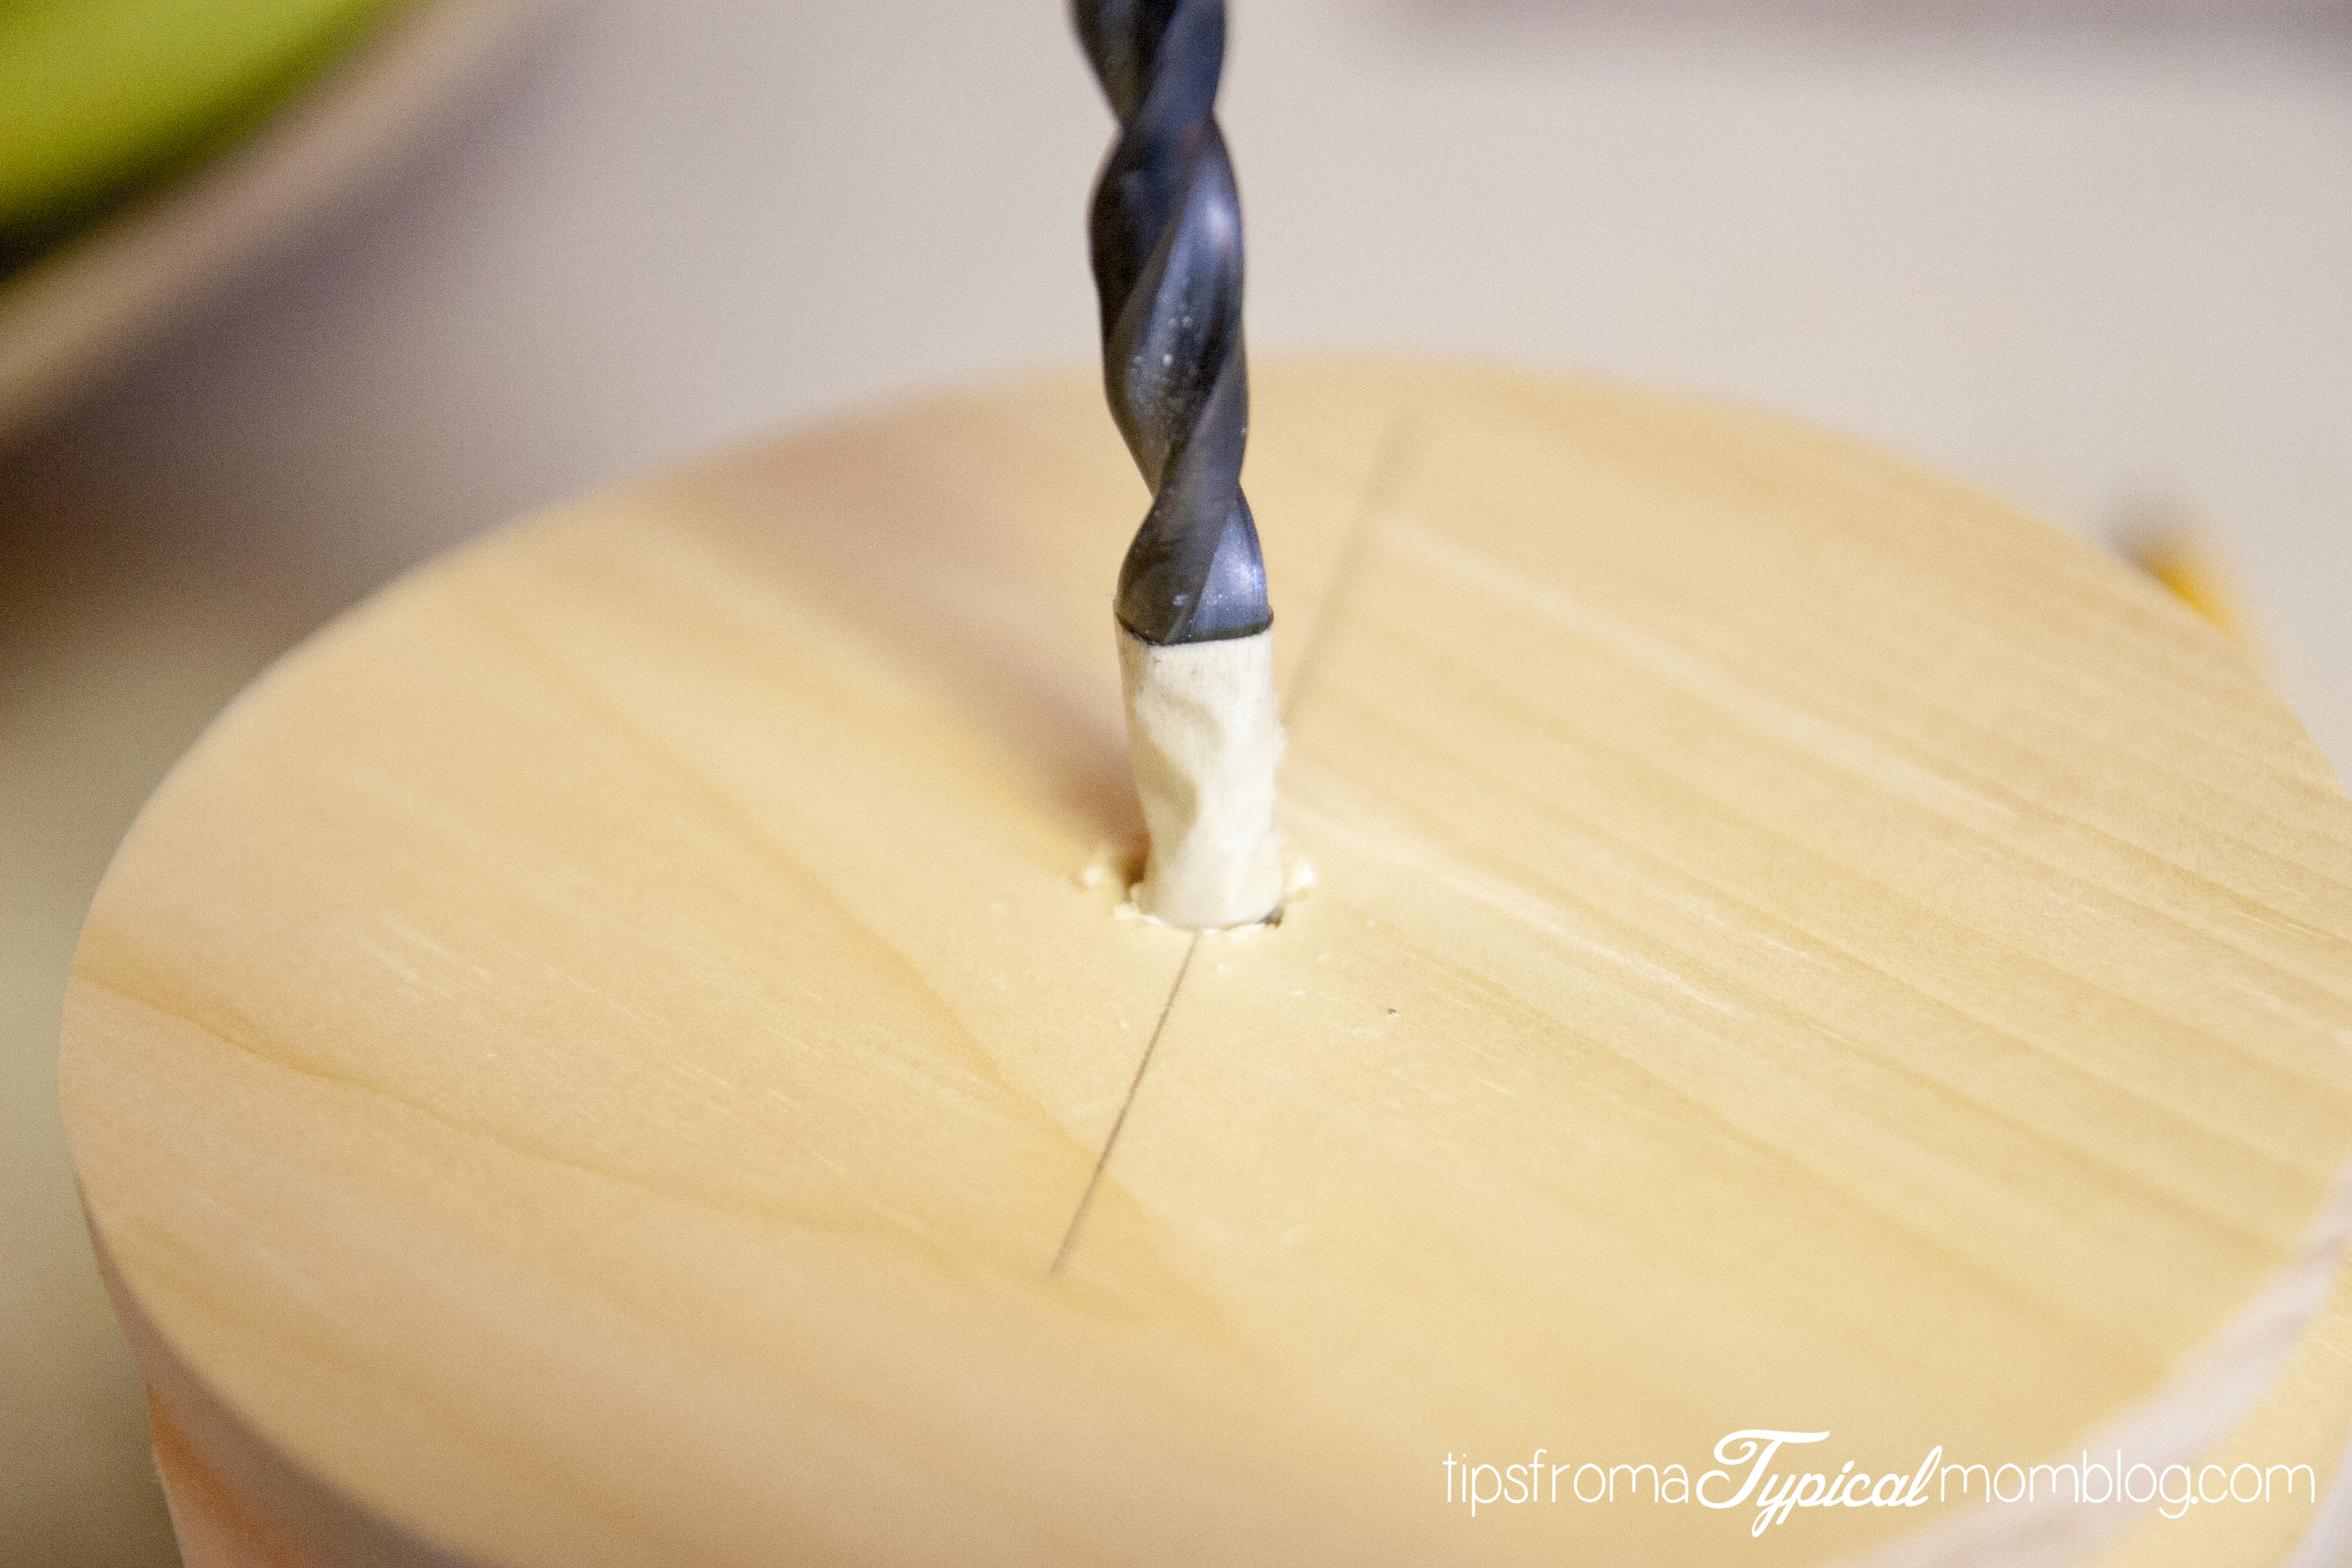
Start out by measuring a half an inch on your drill bit and marking it with masking tape. That way you won’t accidentally drill all the way through.

IMG_0070

Measure to the center of the round.

**2 rounds get the holes drilled on top and 2 rounds get the holes drilled on the bottom.**

Stop drilling when you reach the tape on the bit.

IMG_0073

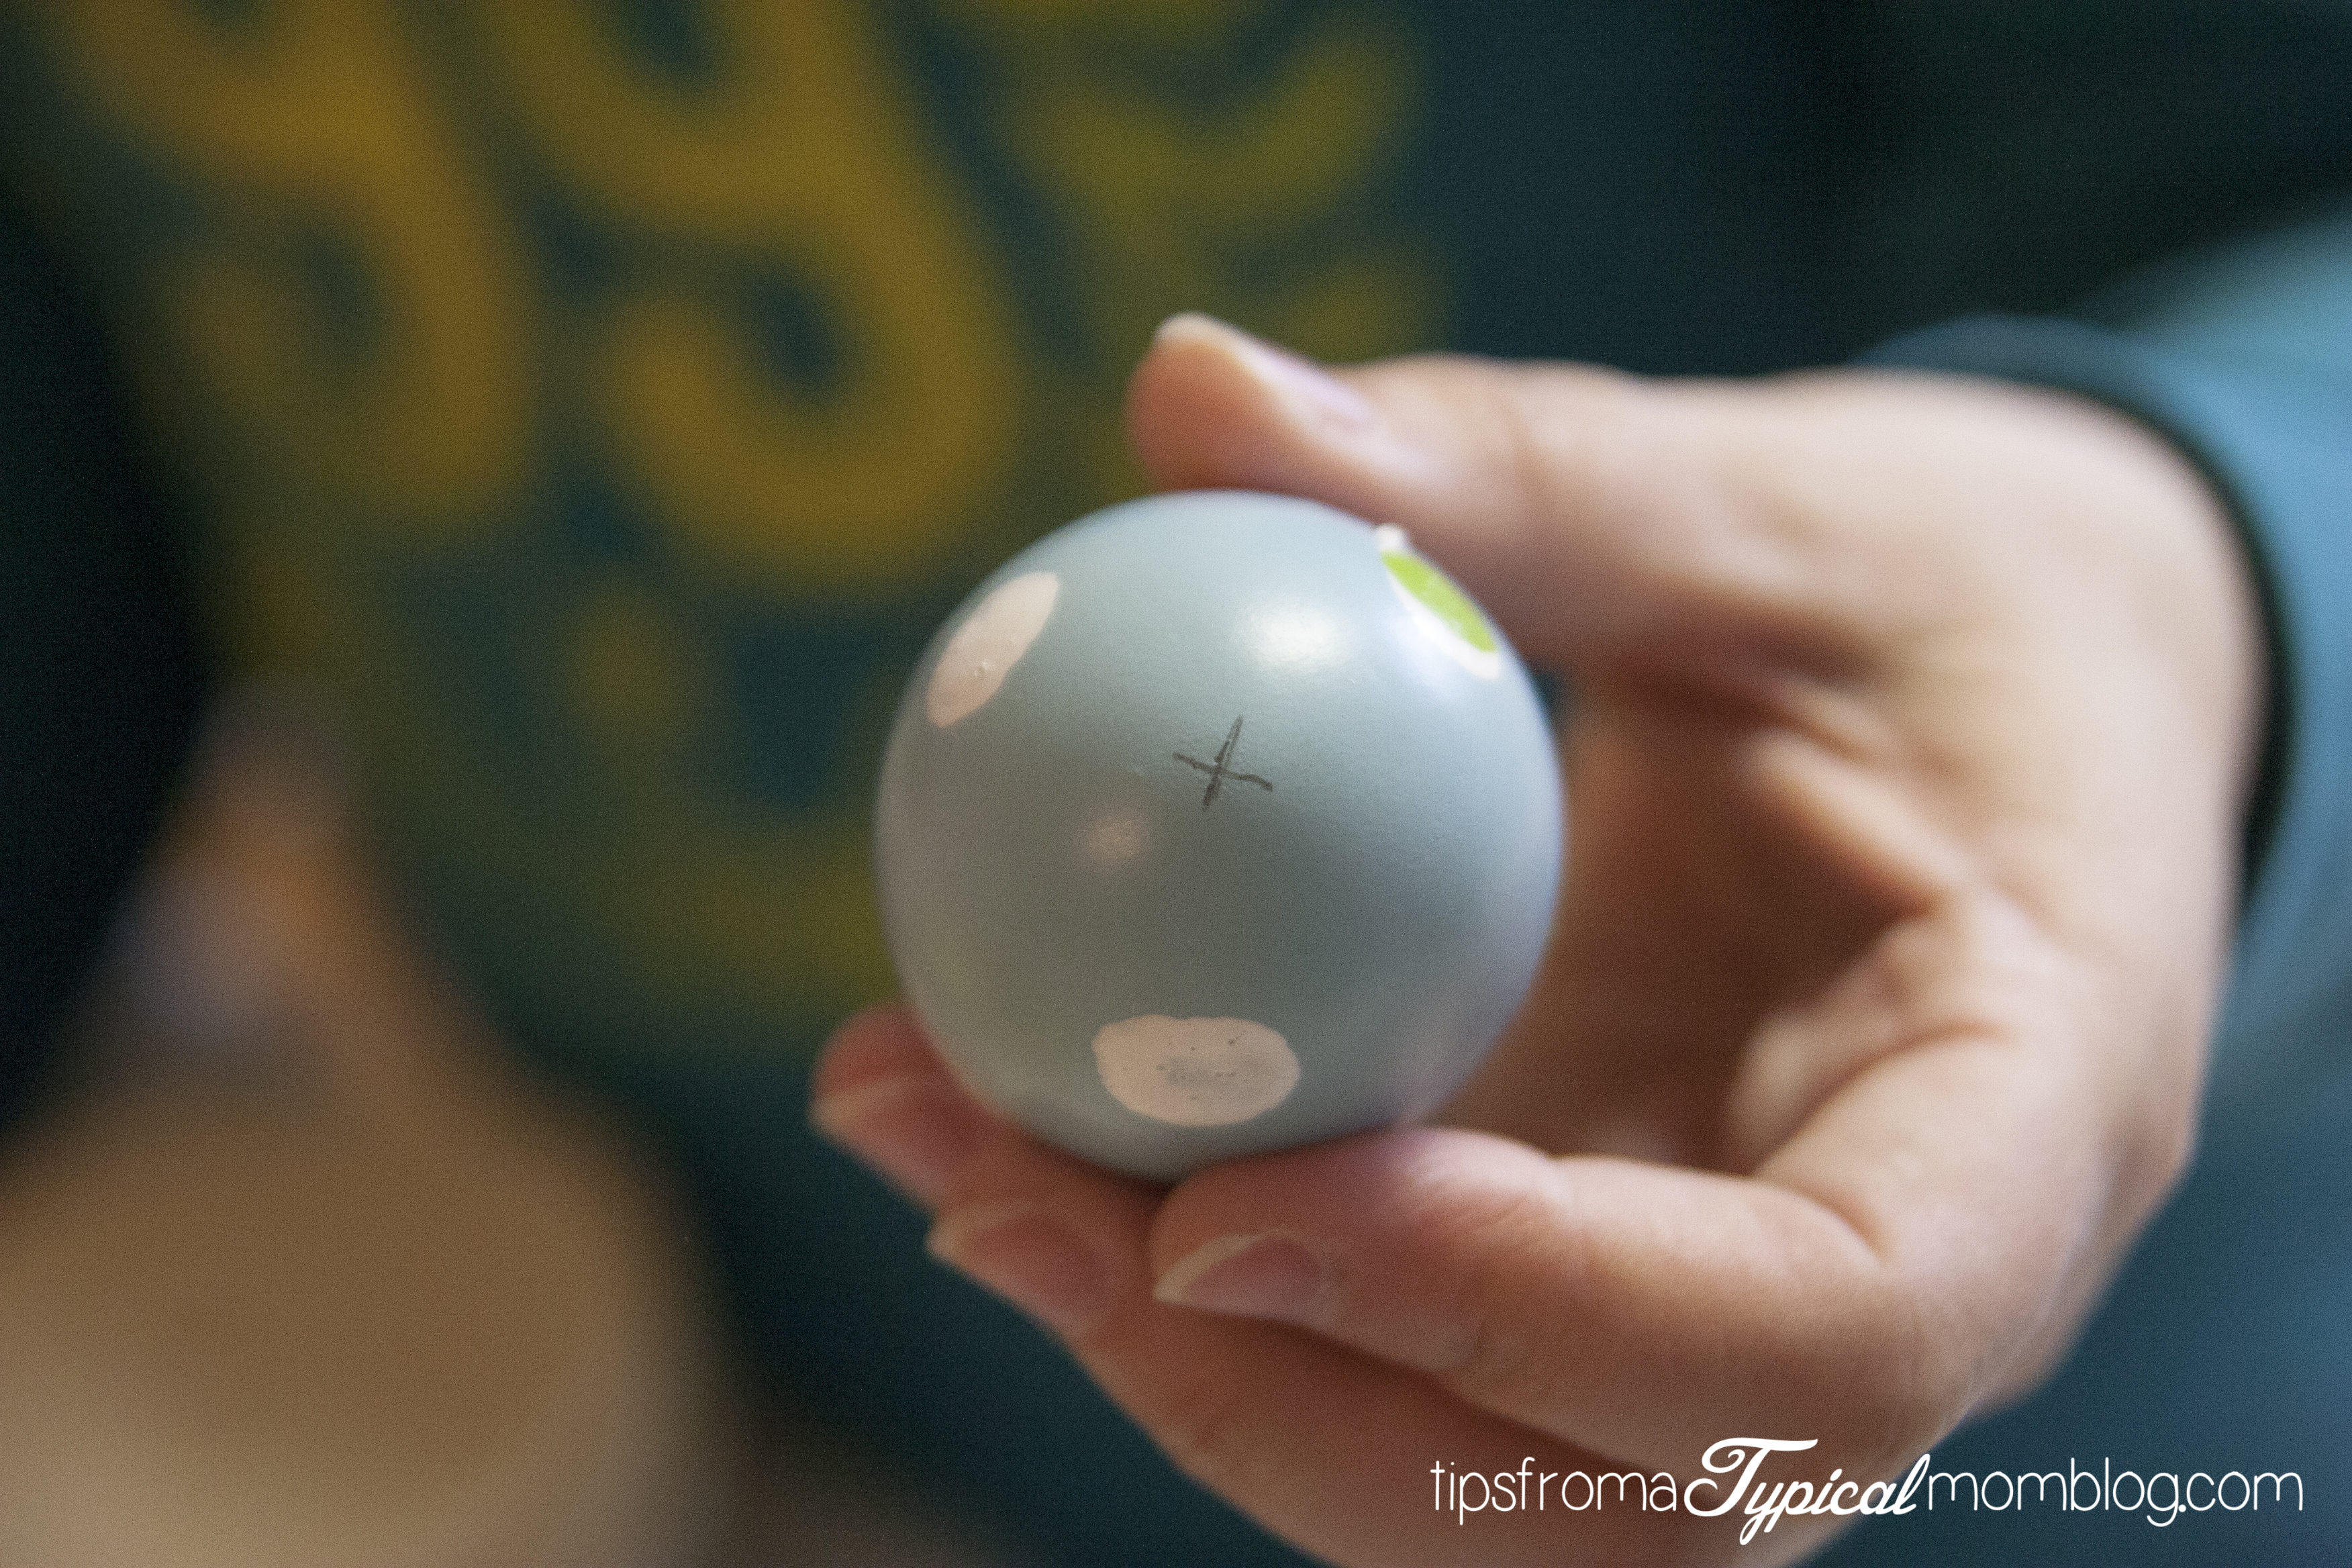
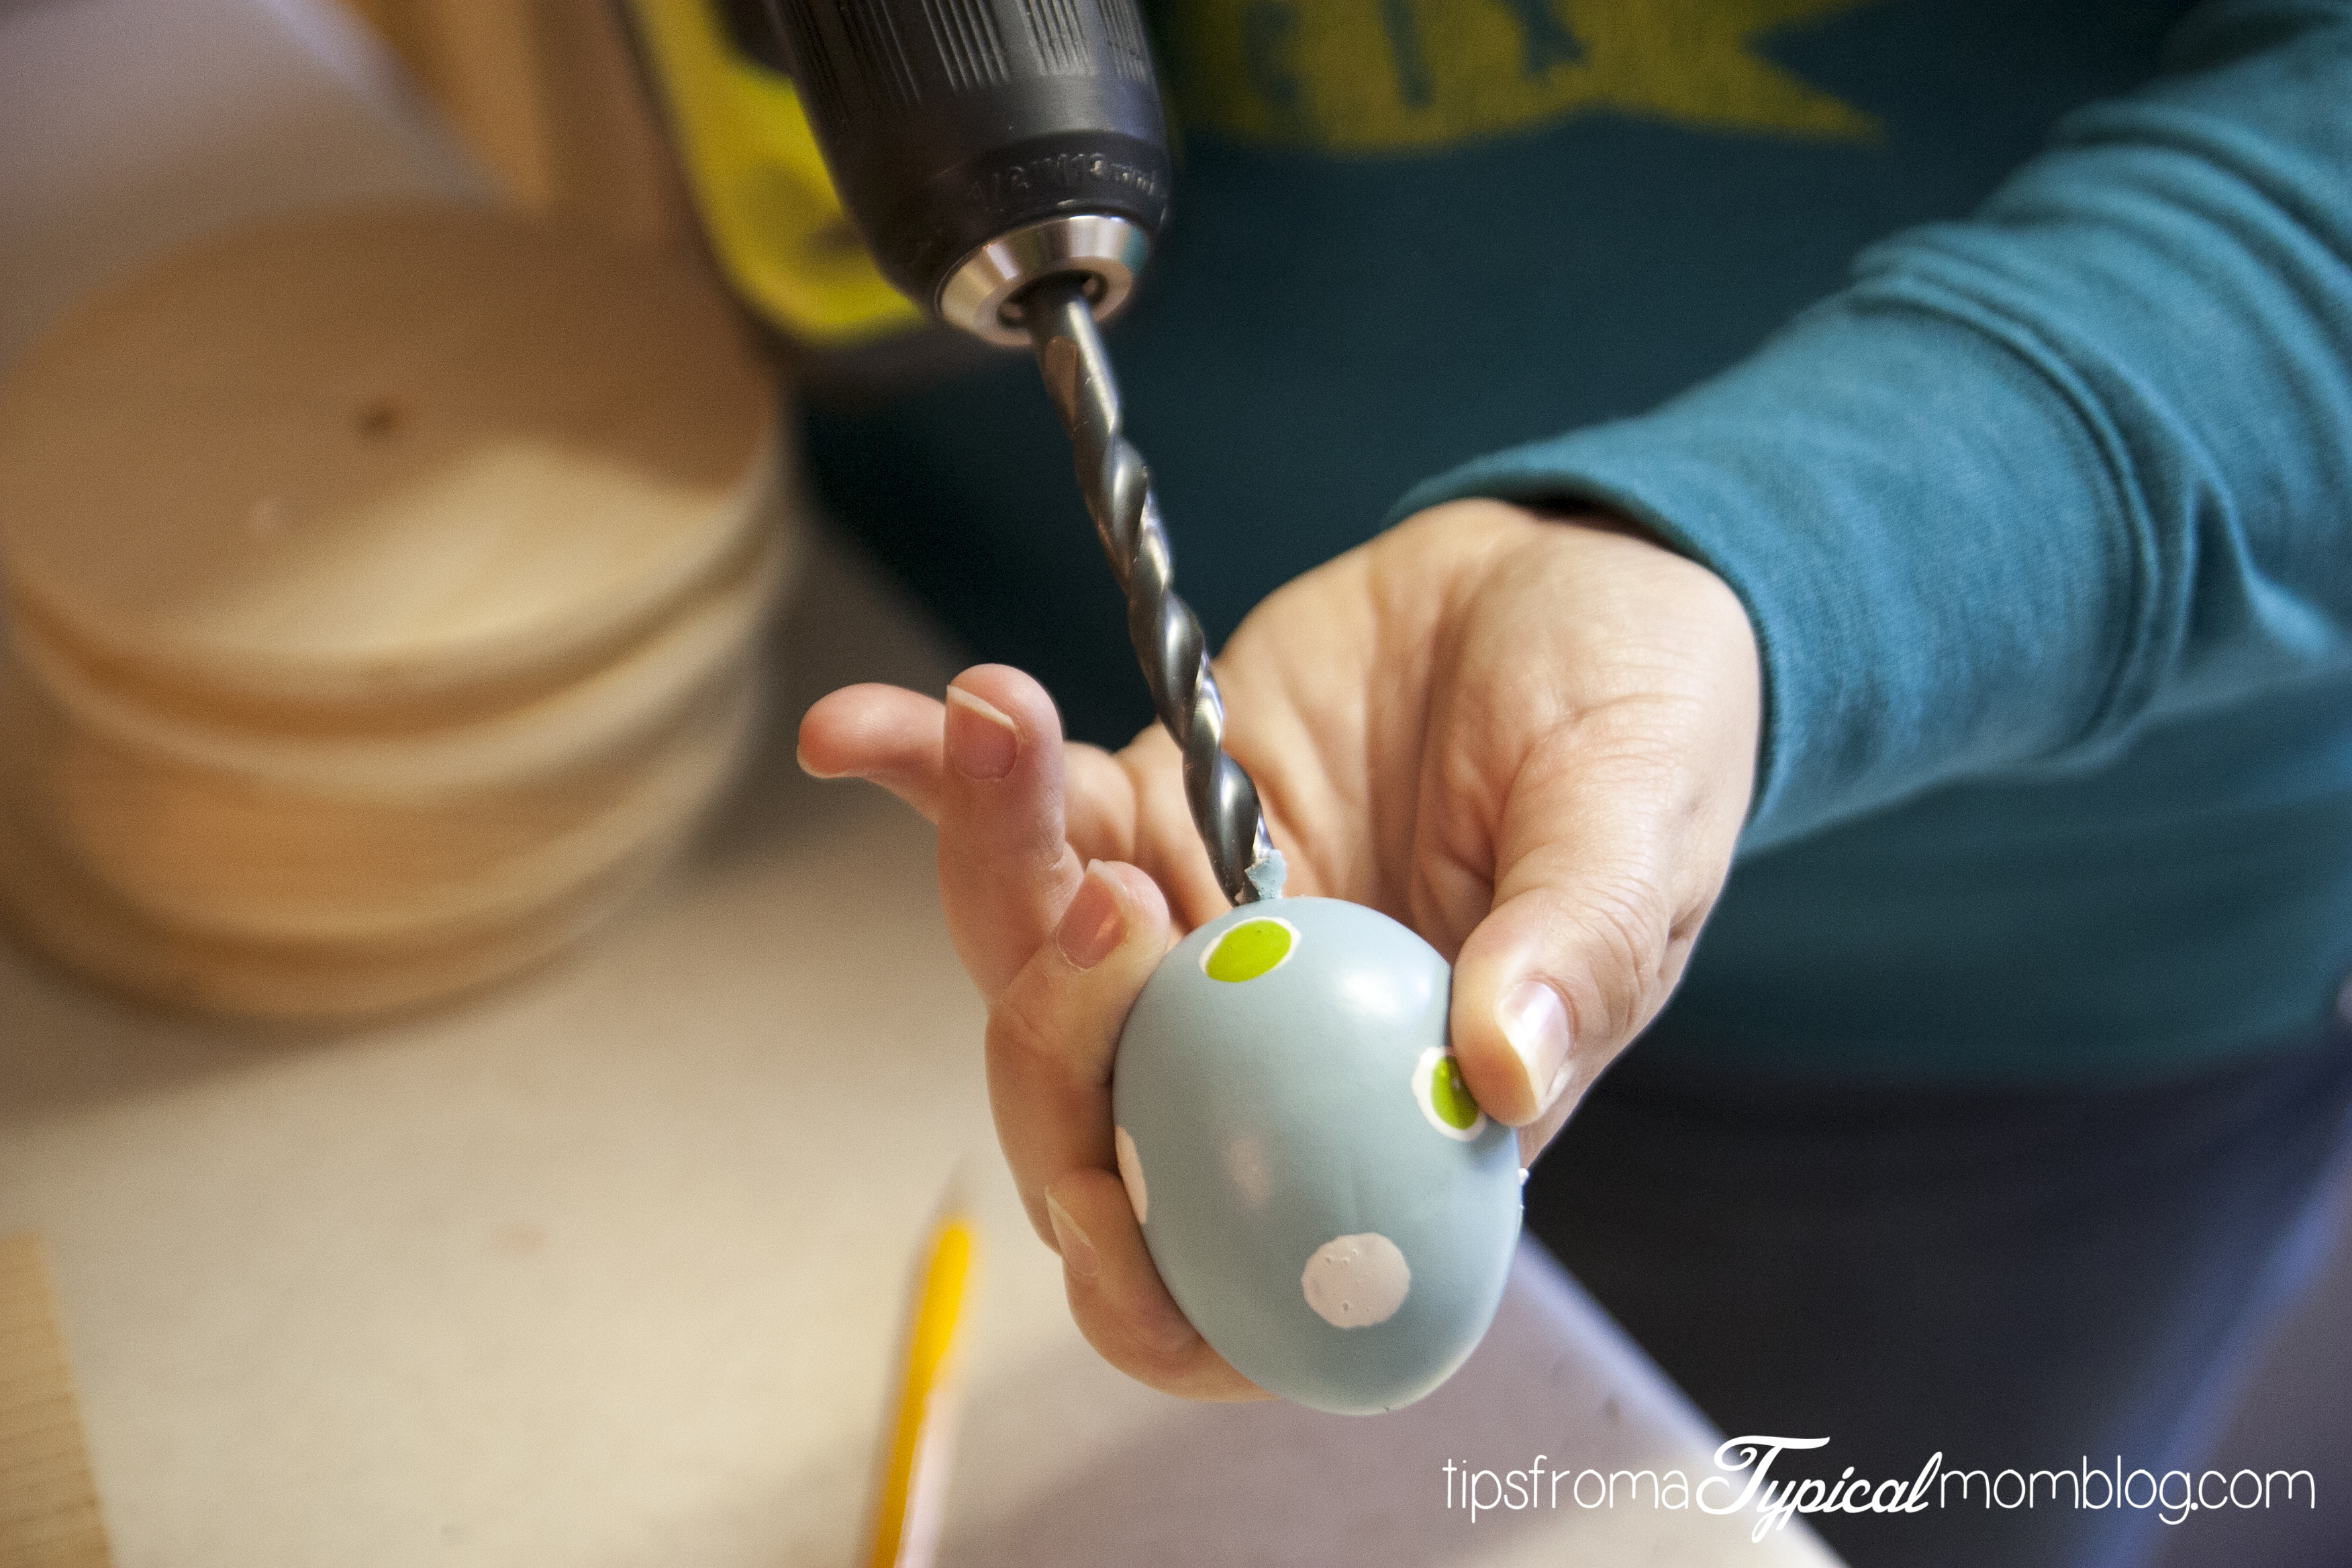
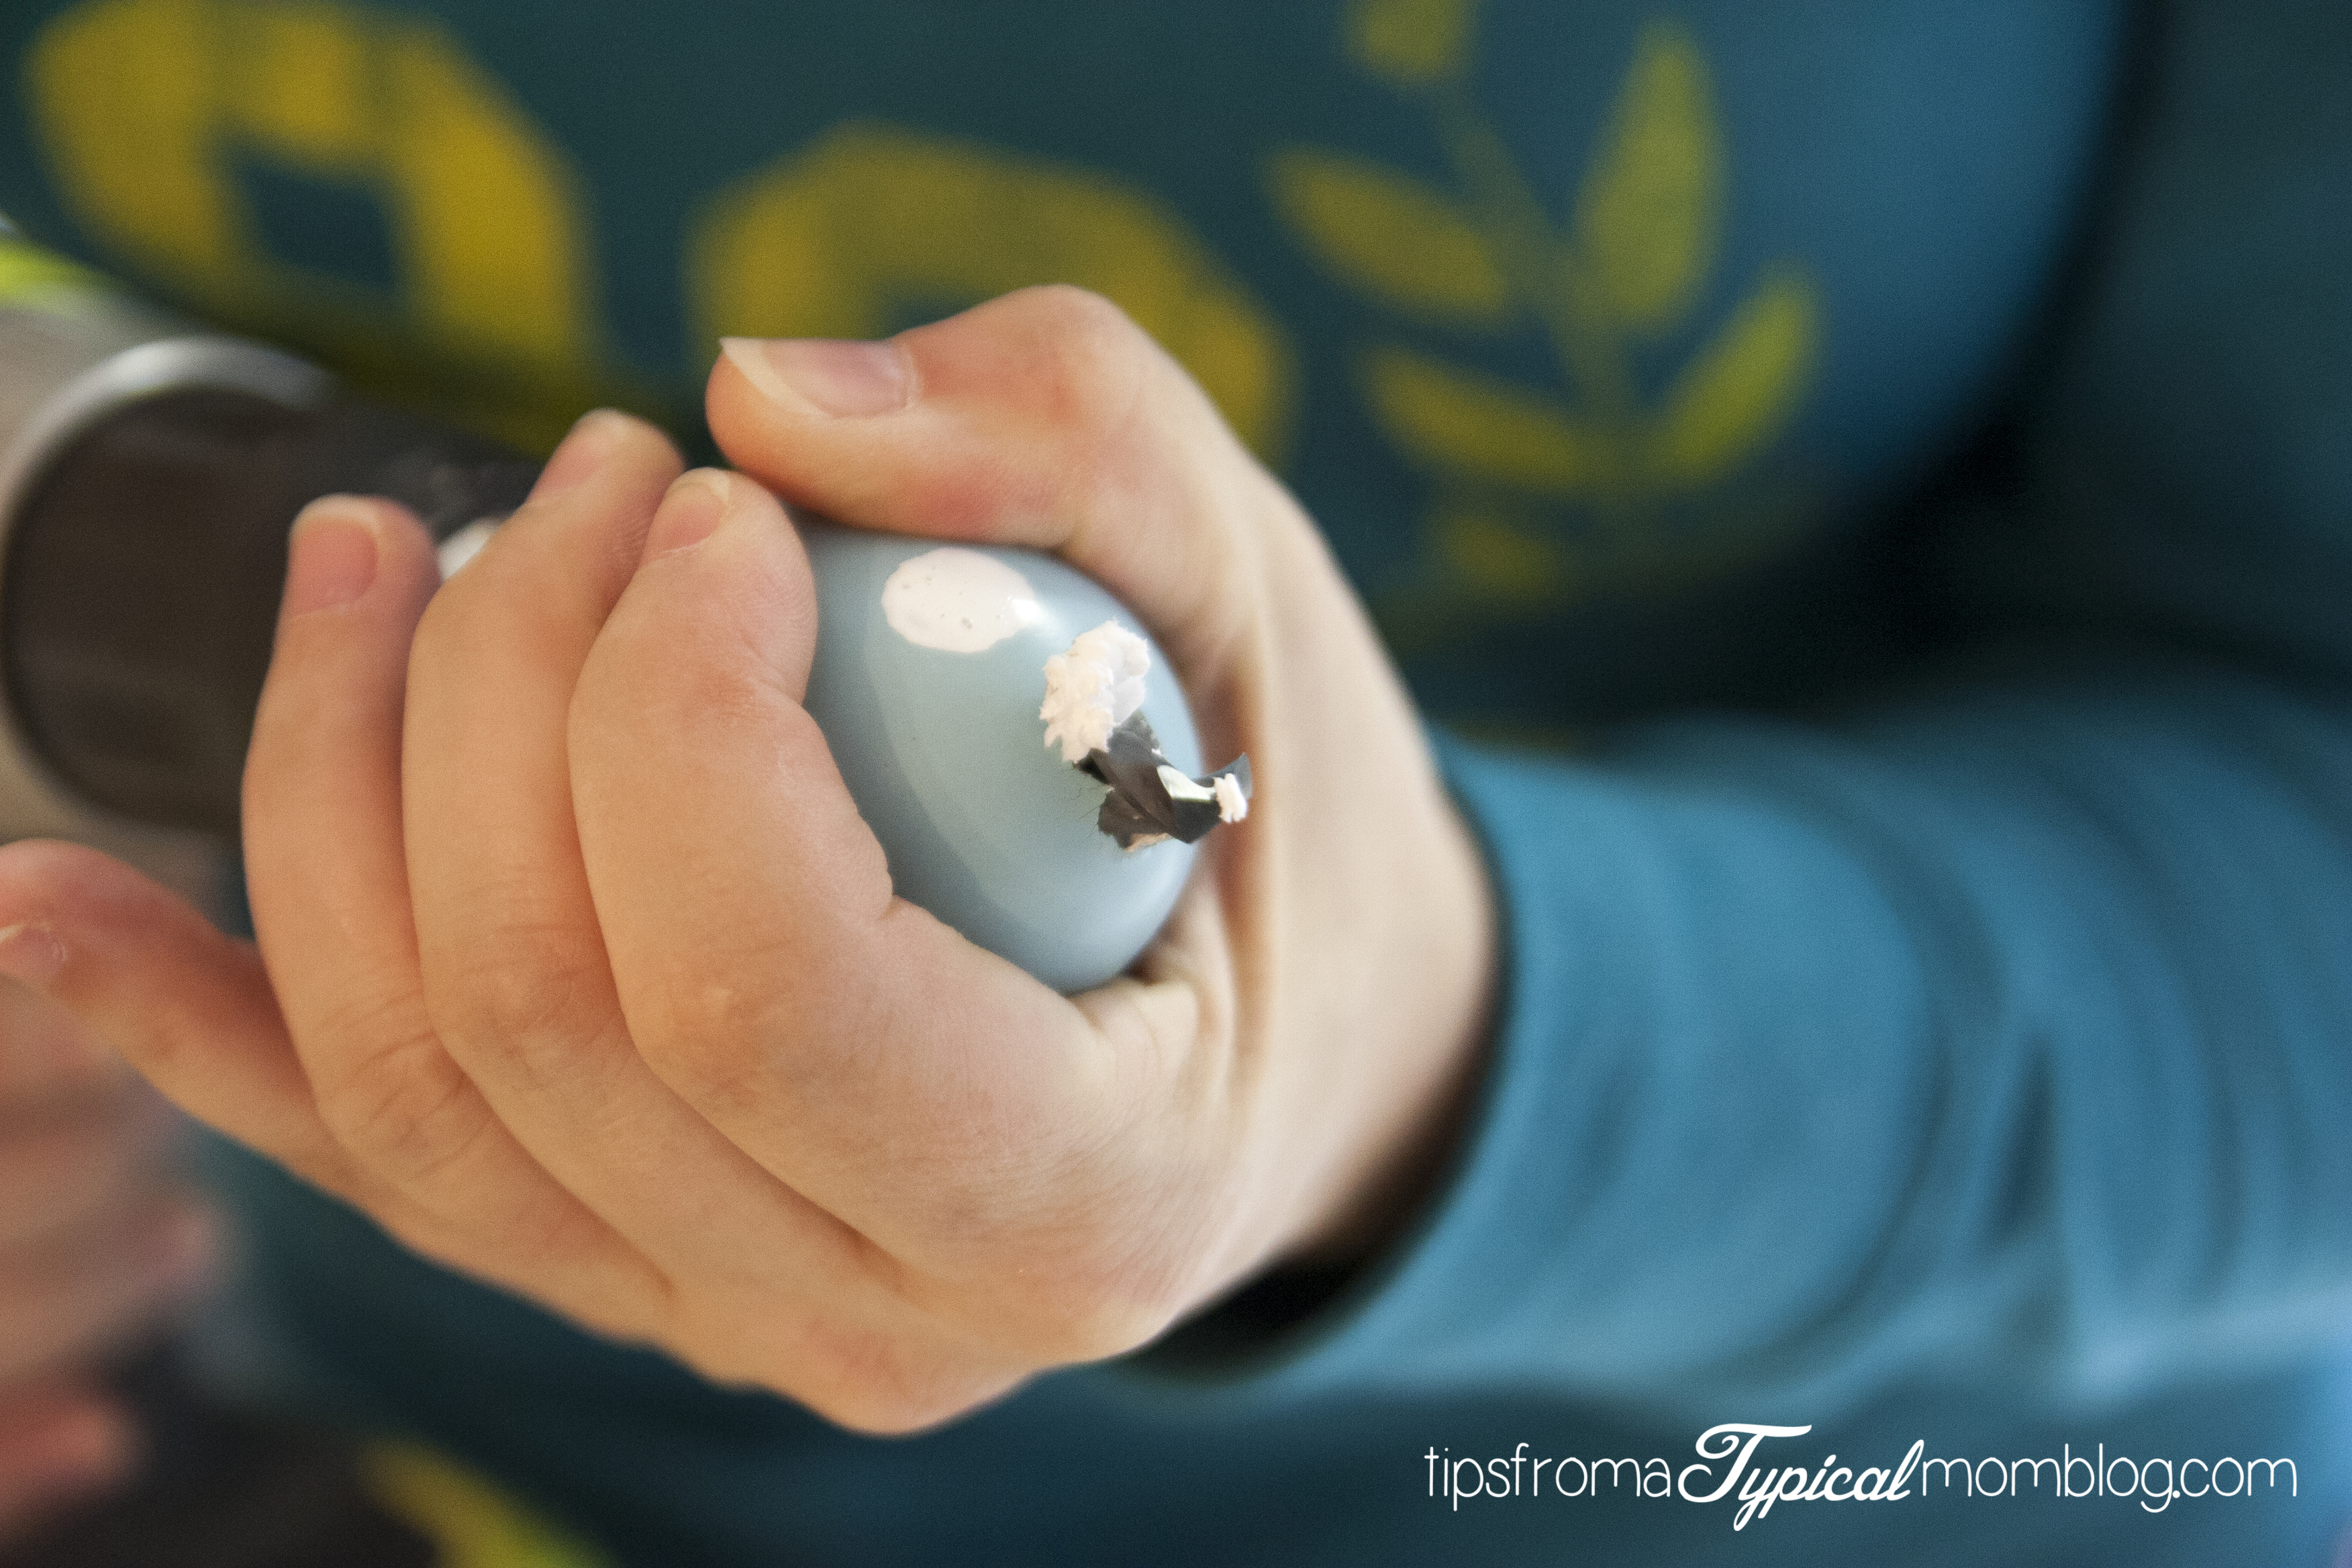
Now mark the center of the bottom and top of the eggs and try as hard as you can to drill straight through.

After doing this the hard way I figured out that I should just start at the bottom until I’m halfway through and then start at the top and meet halfway through.
It’s really hard to get a straight hole through these eggs if you don’t do it this way.

IMG_0075

IMG_0076

IMG_0078

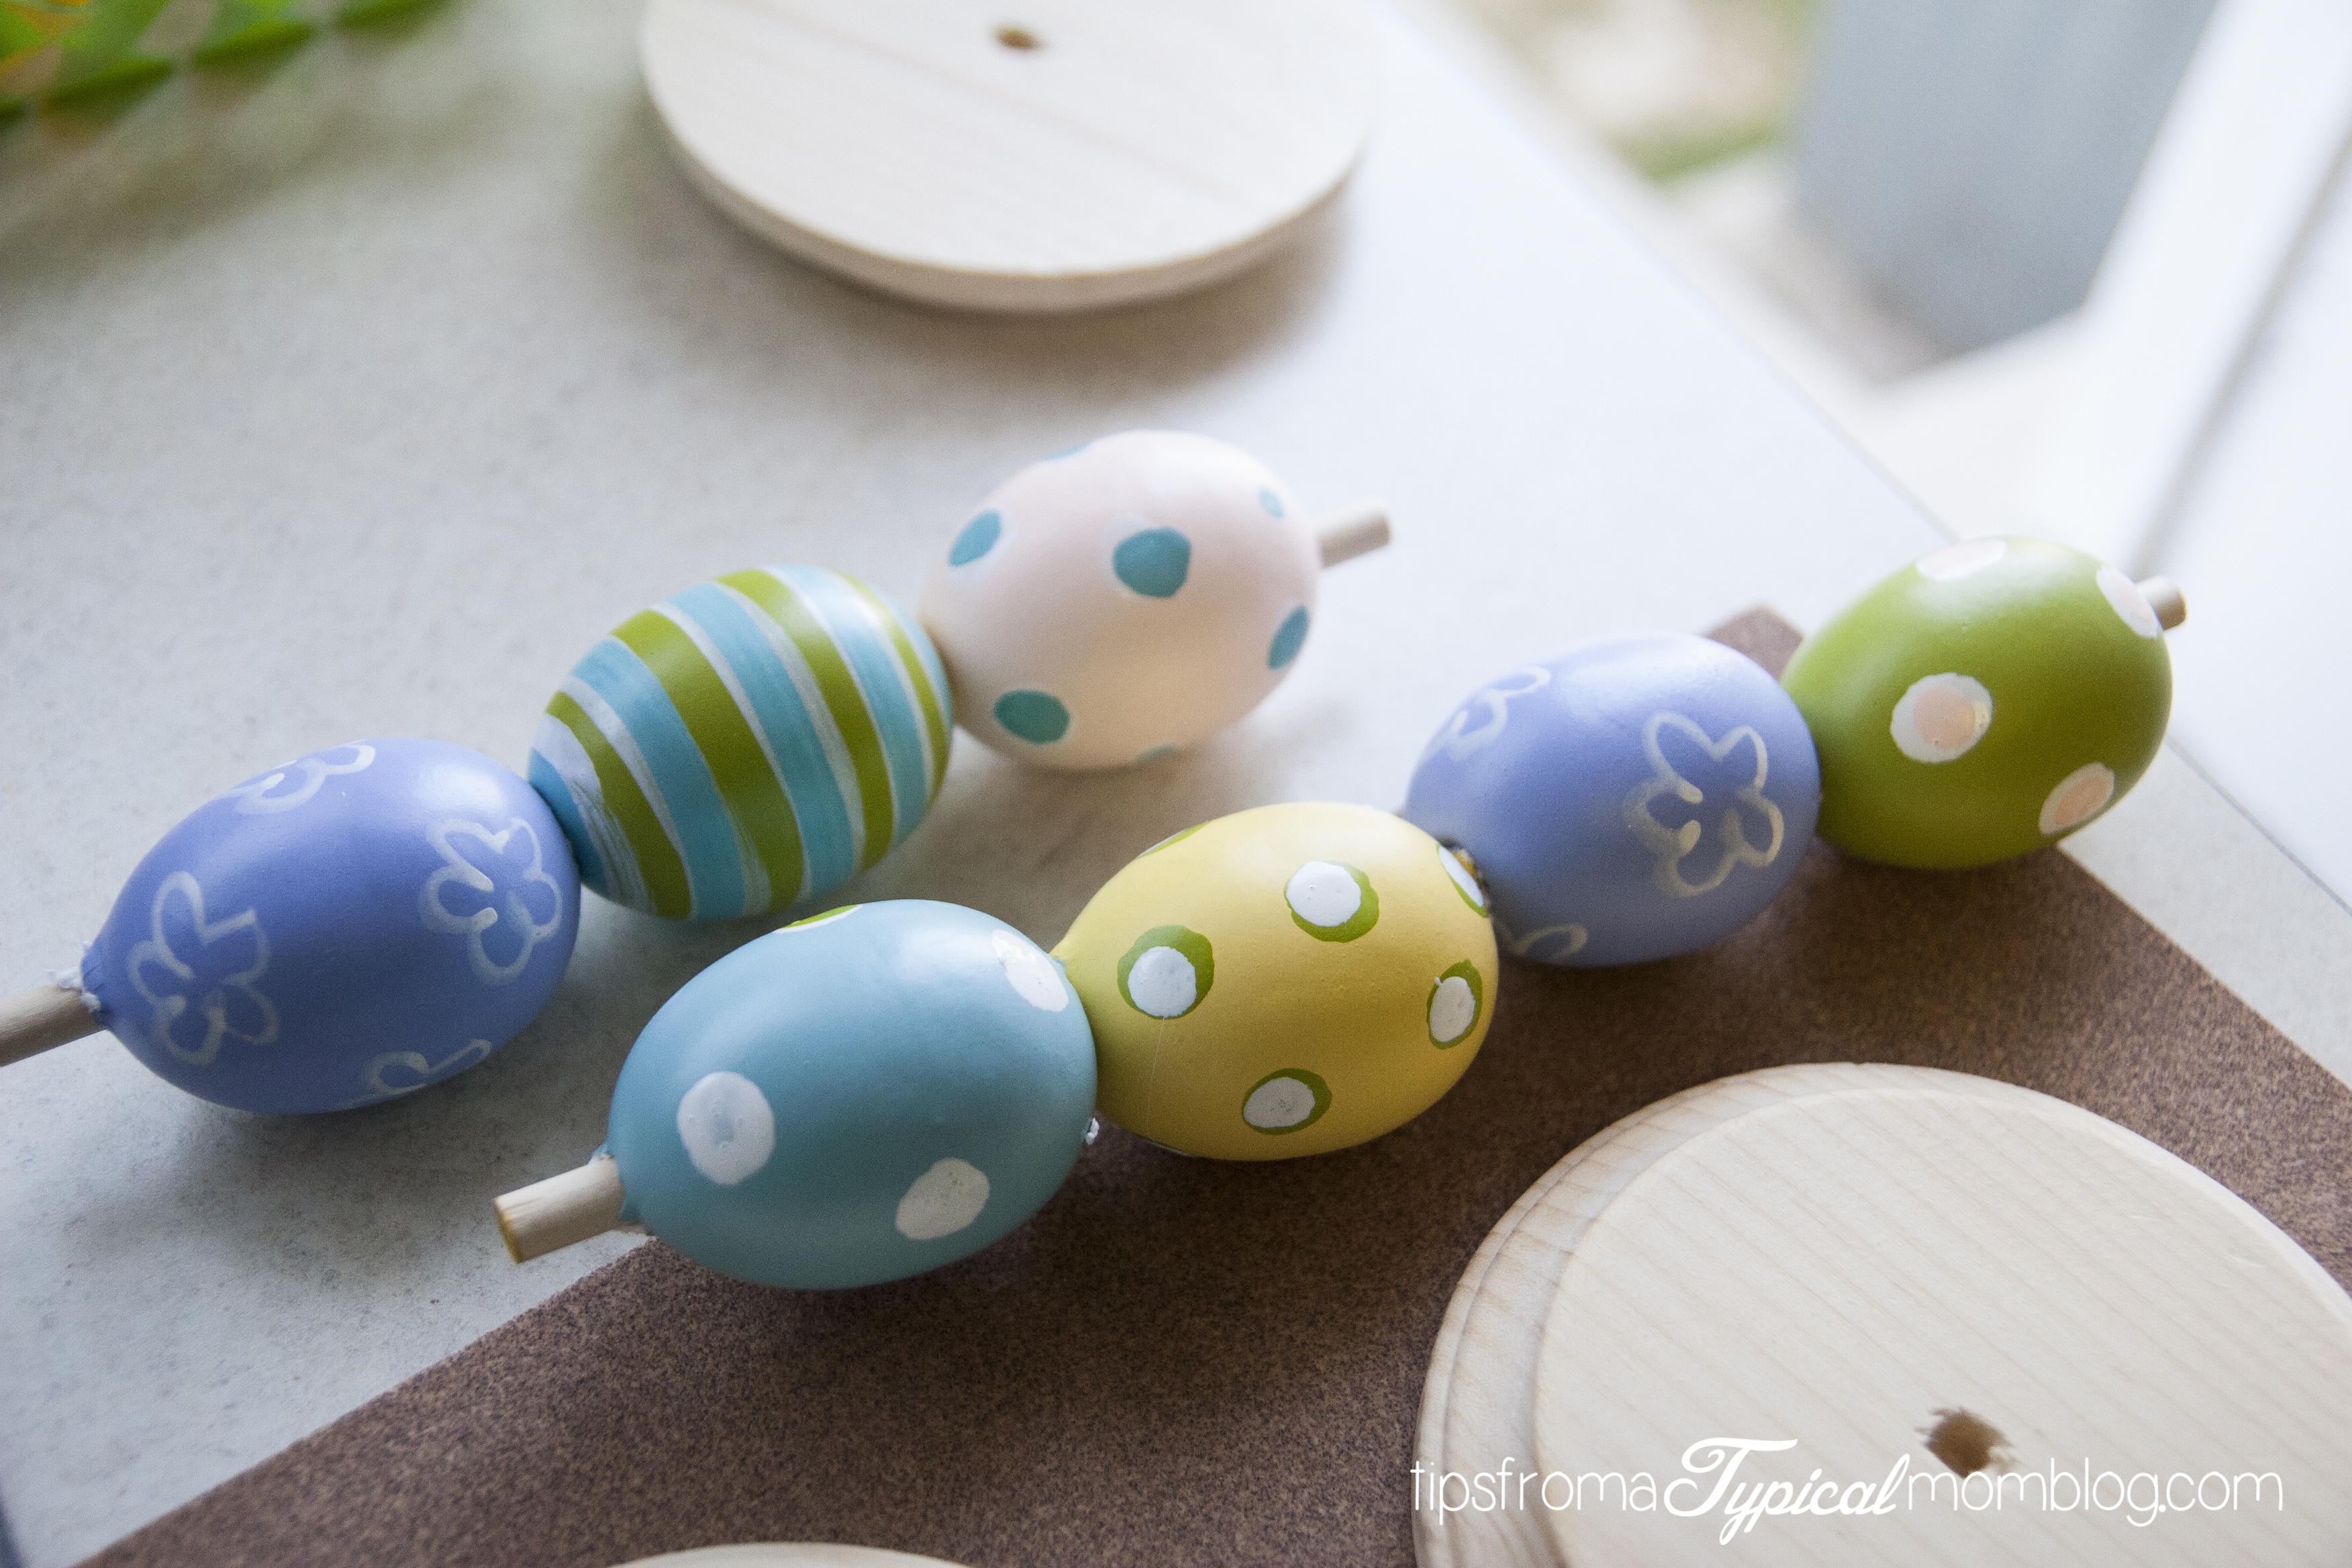
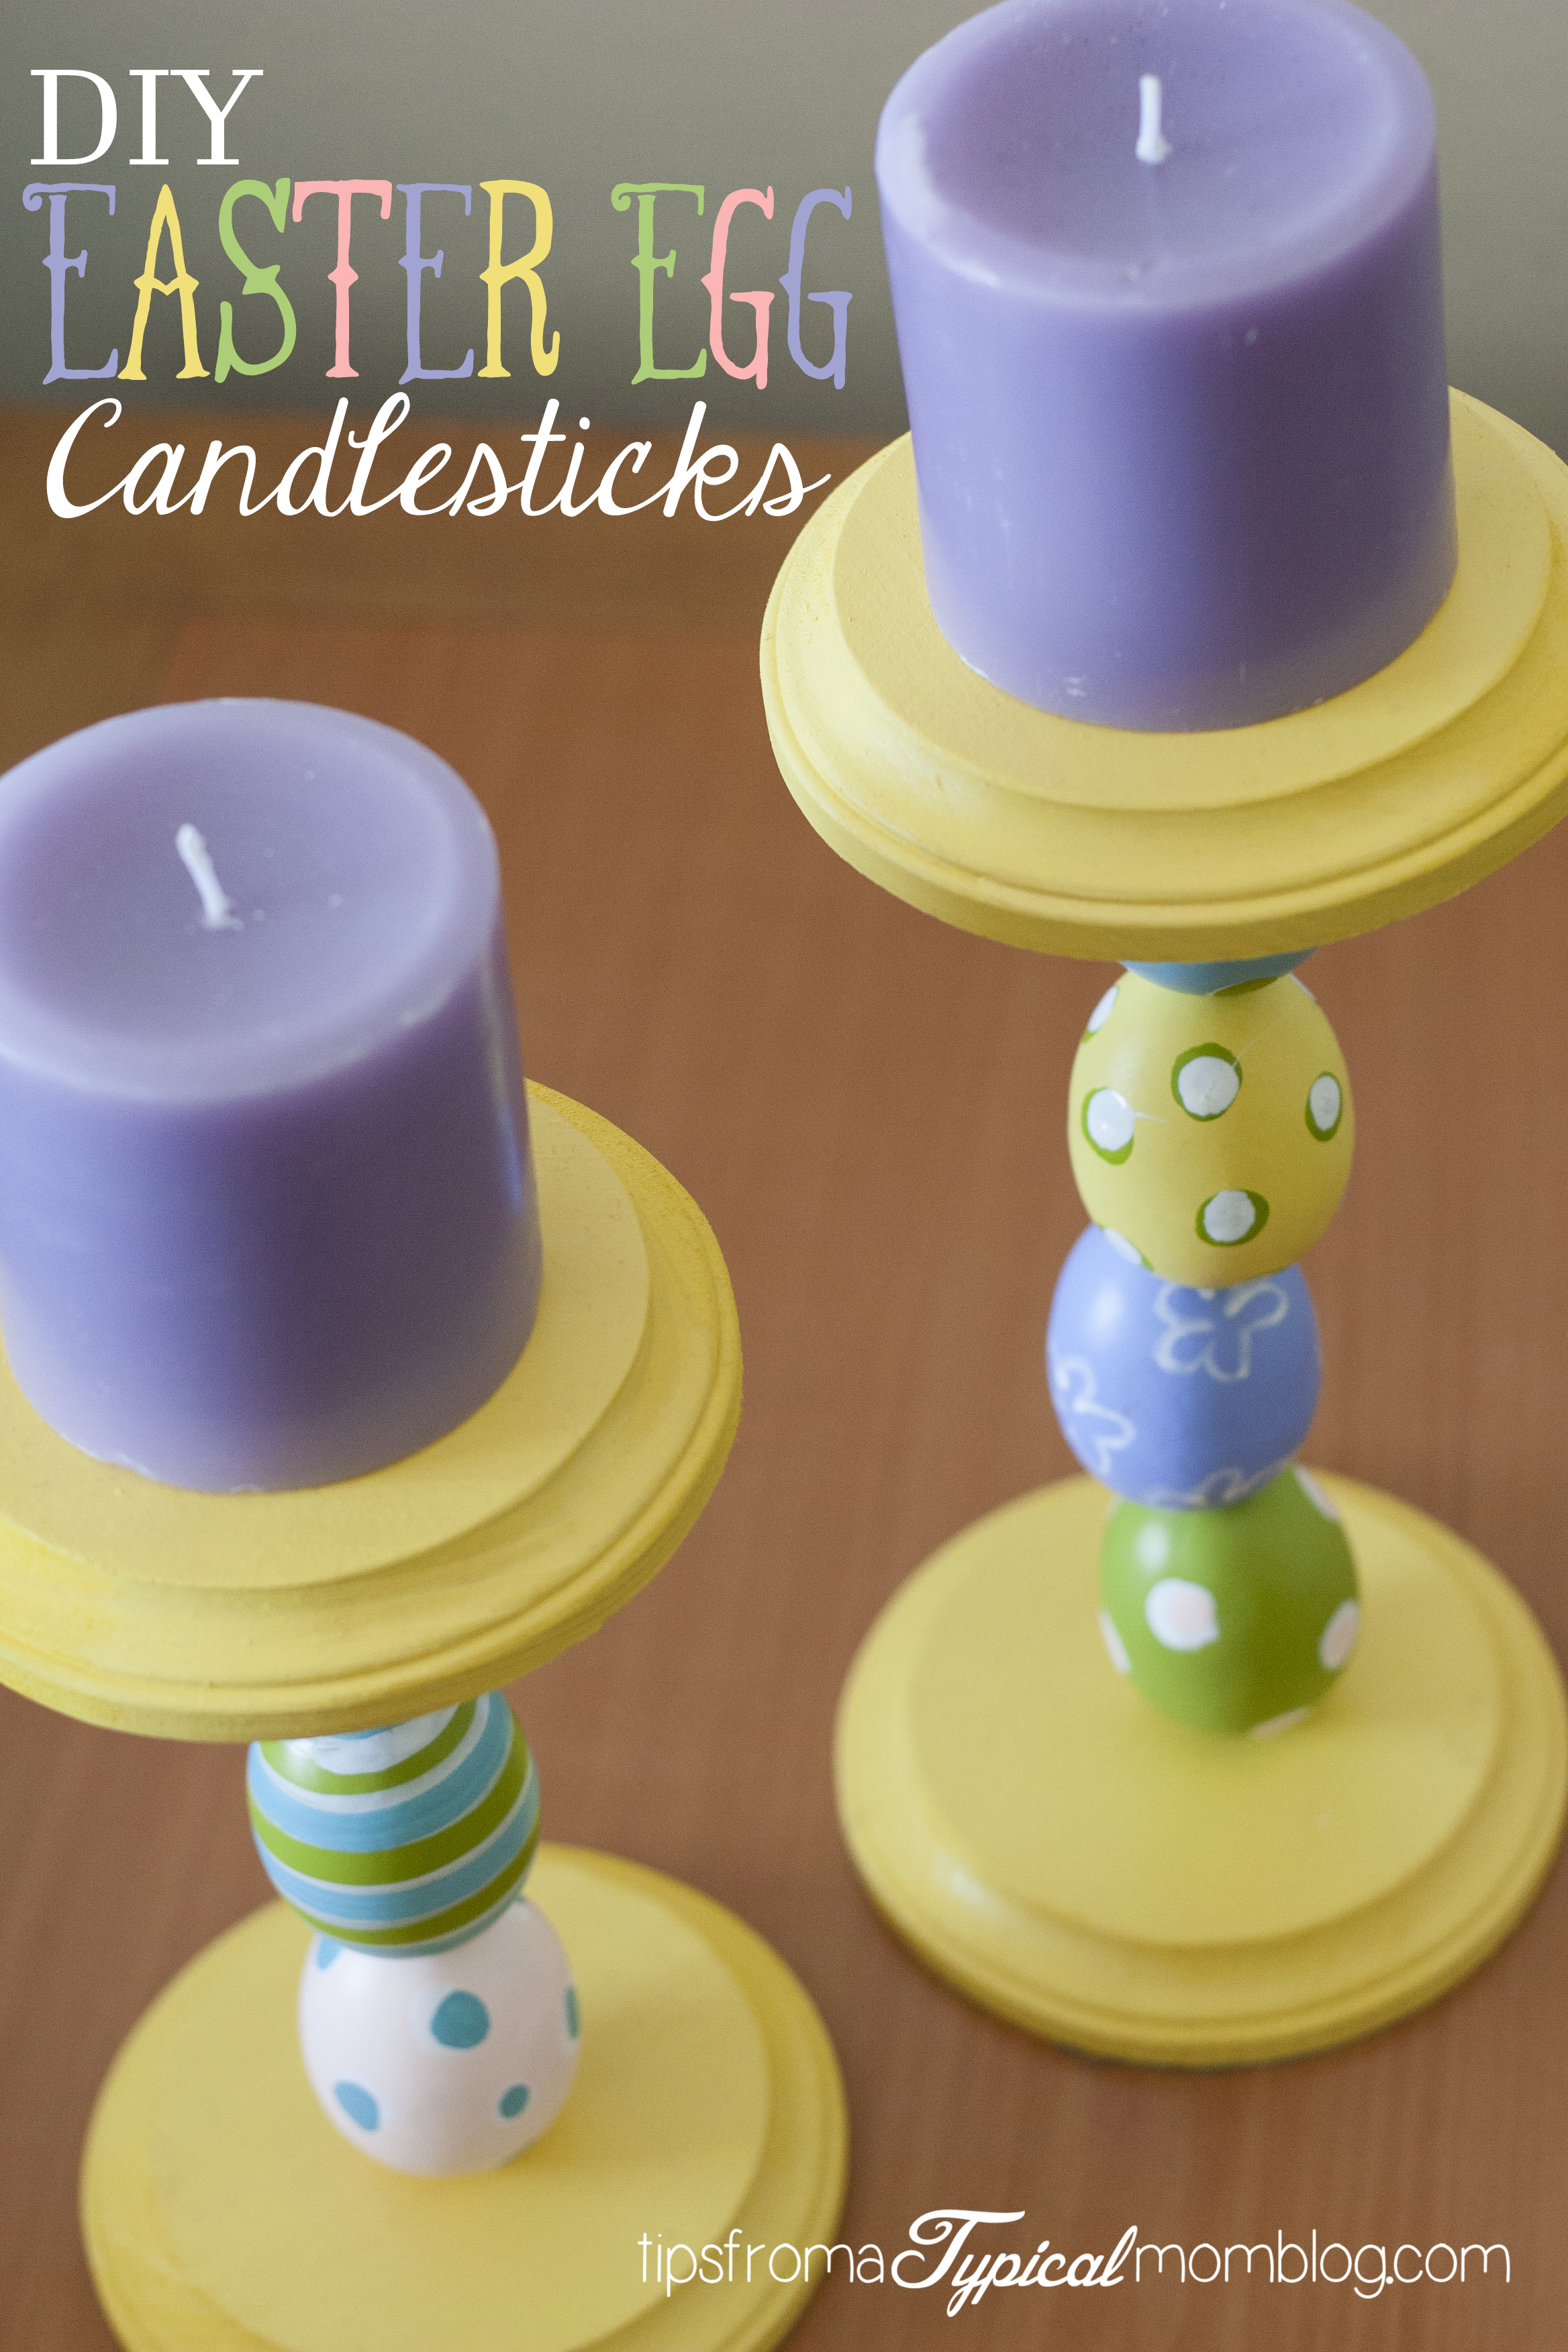
Now slide your eggs onto your dowel. I did 3 and 4, but I would suggest 3 and three for a more stable candlestick.

IMG_0079

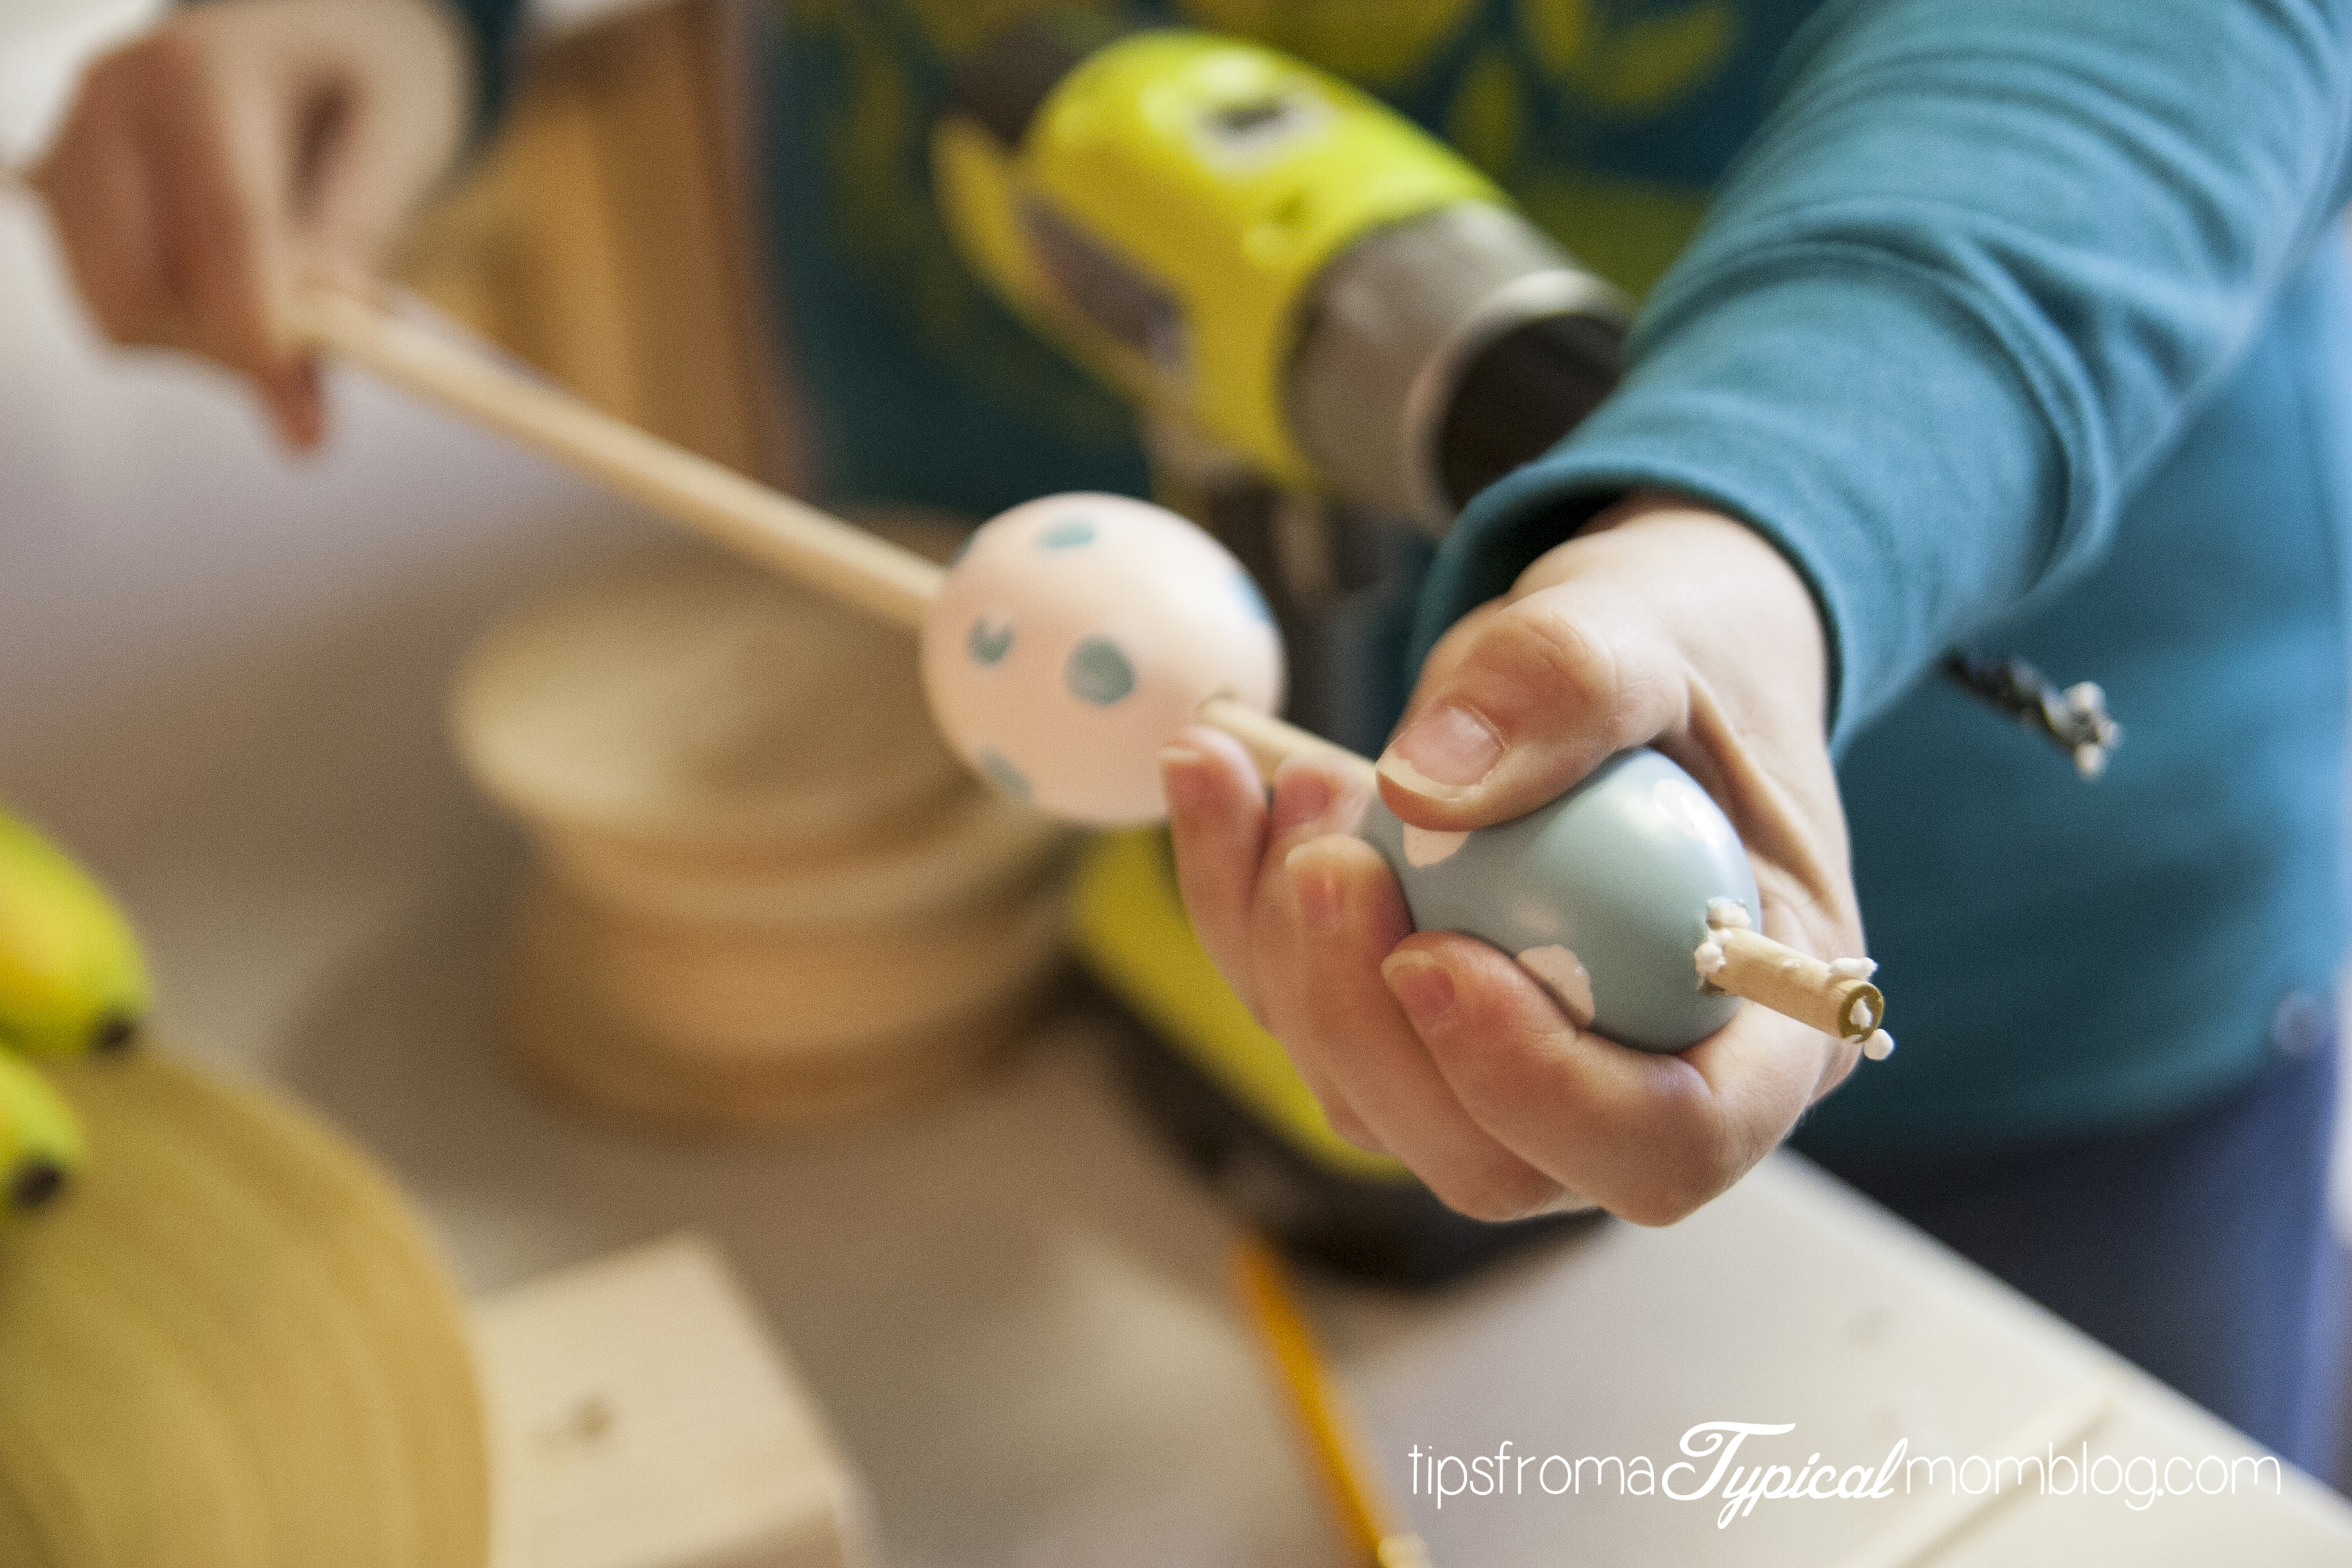
Now cut the dowel with a handsaw about 1/2 inch away from the eggs on both sides like so:

IMG_0081

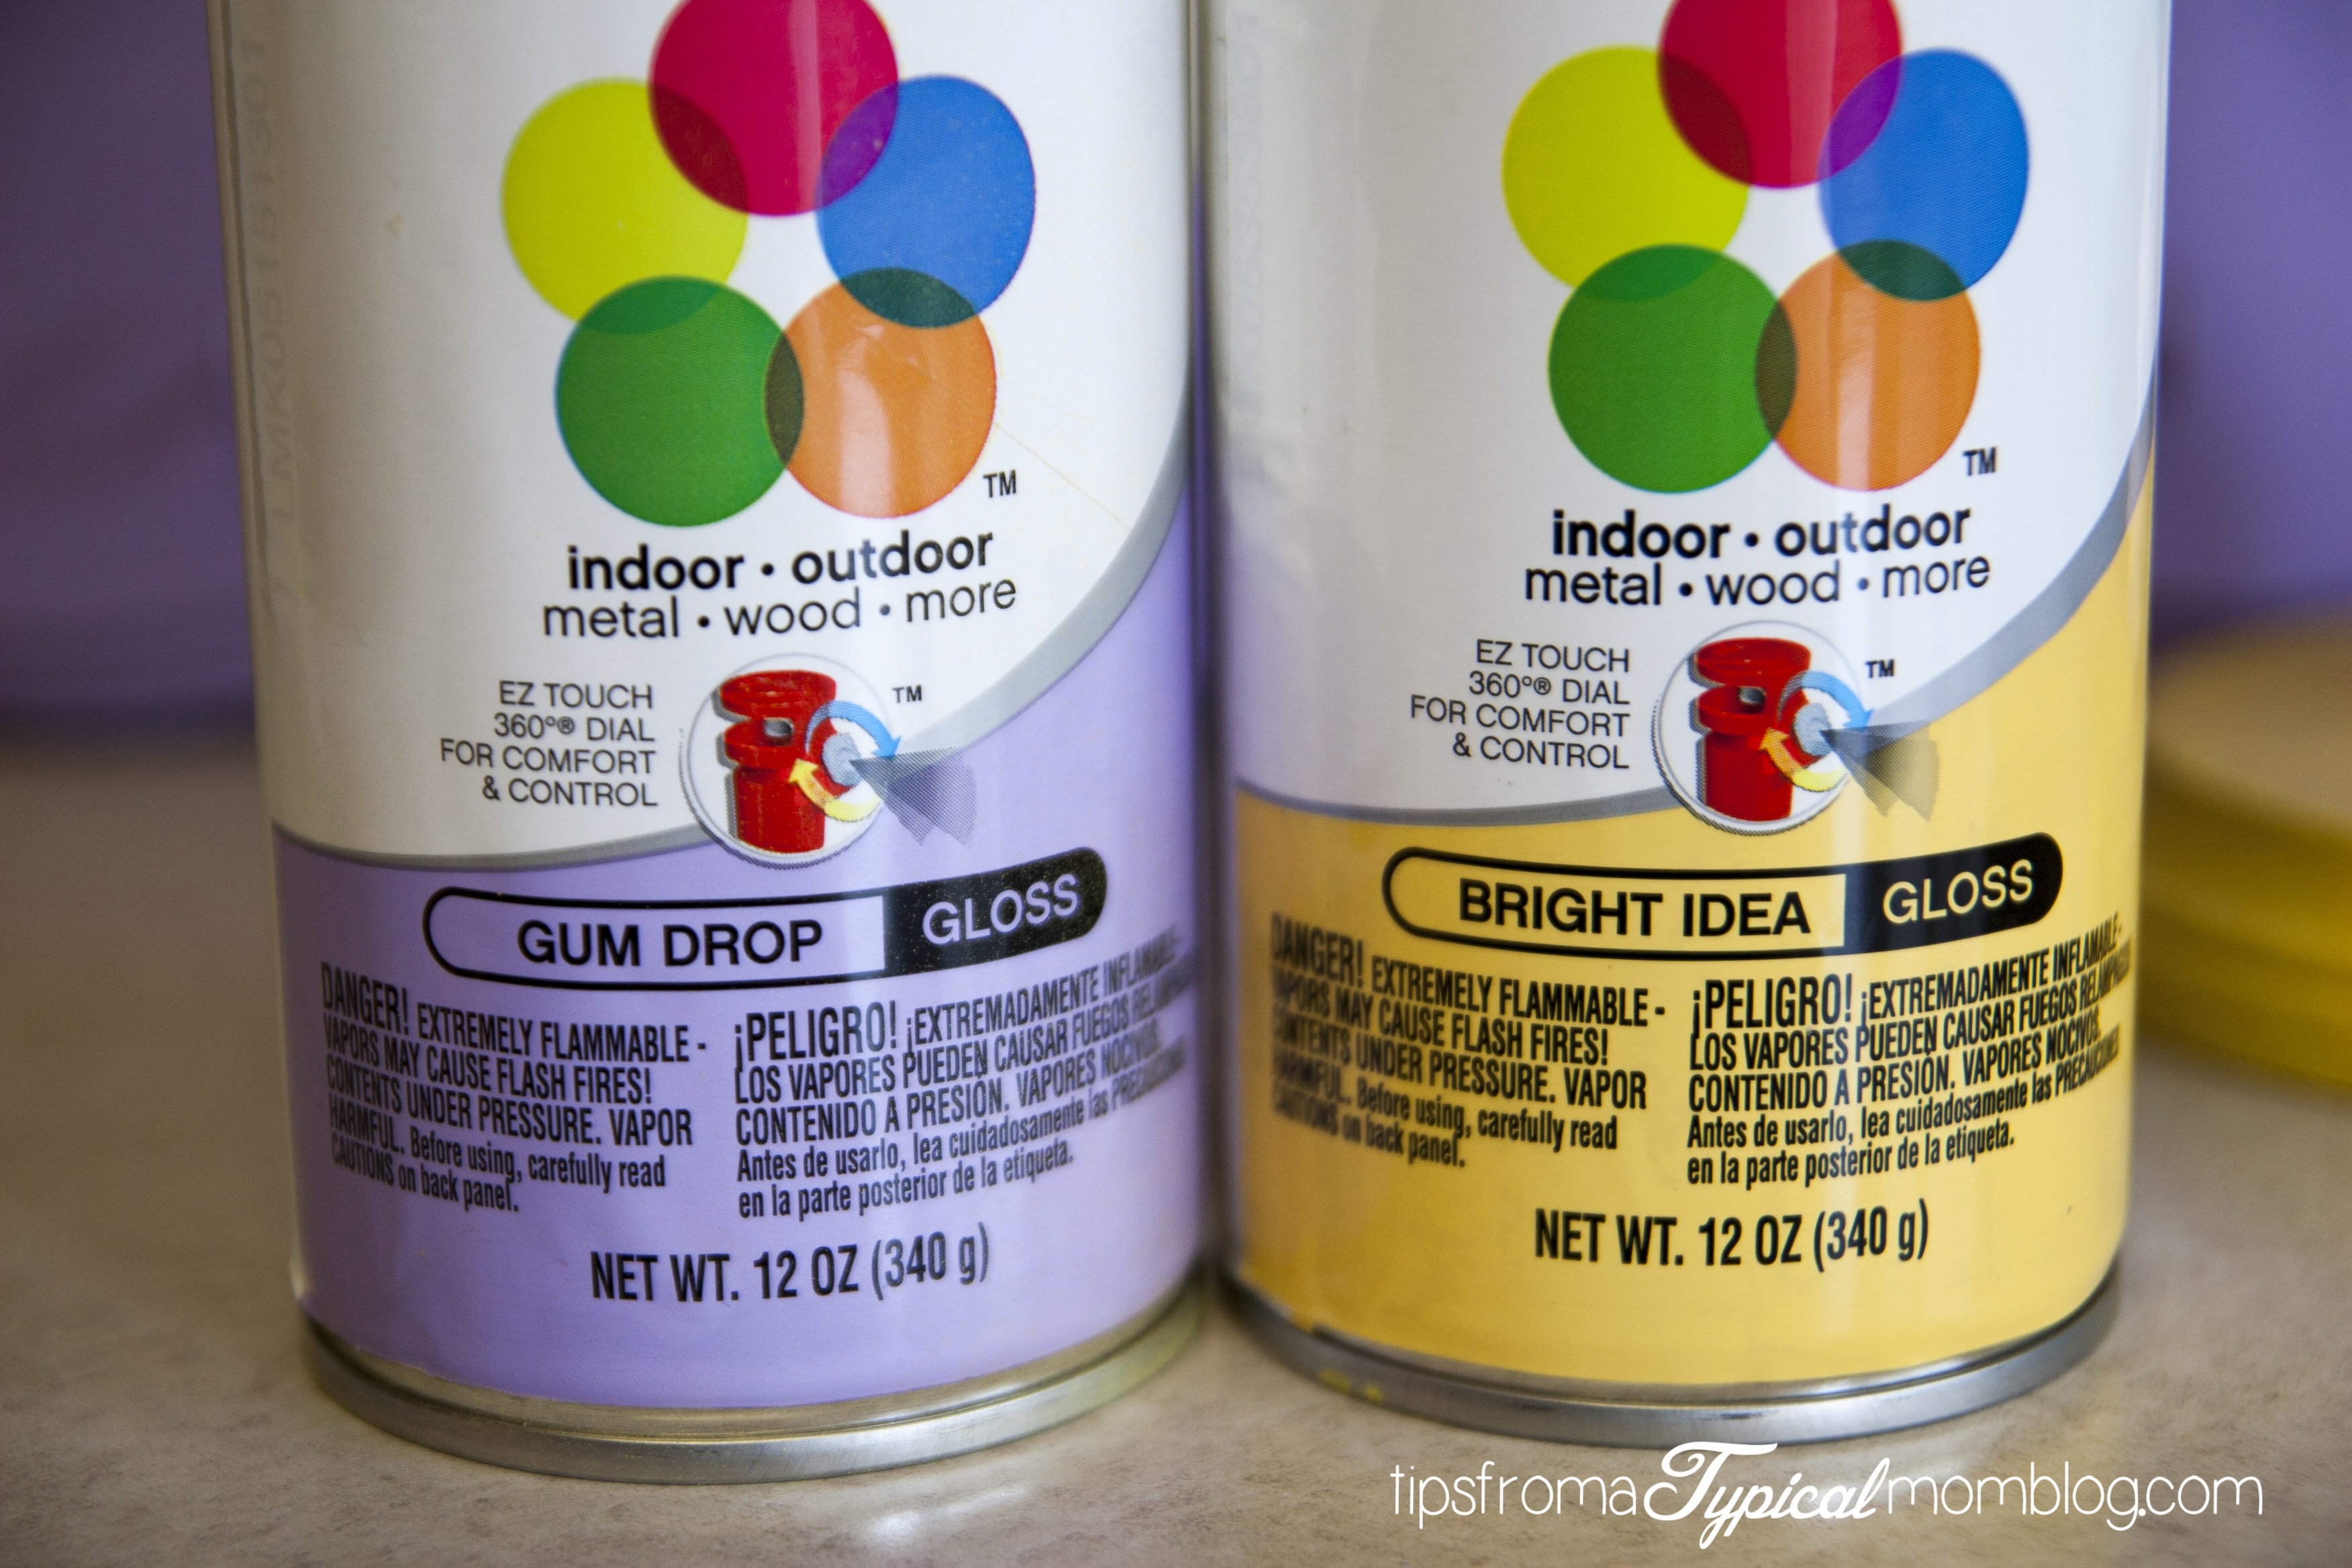
Now sand and paint your rounds. I used Bright Idea from Krylon. It’s the perfect yellow for Easter! I used the Gum Drop for other projects that match this one.

IMG_0122

After the paint dries, connect the rounds to the dowels with by squeezing hot glue into the holes and letting dry.

DIY Easter Egg CandleSticks from Tips From a Typical Mom

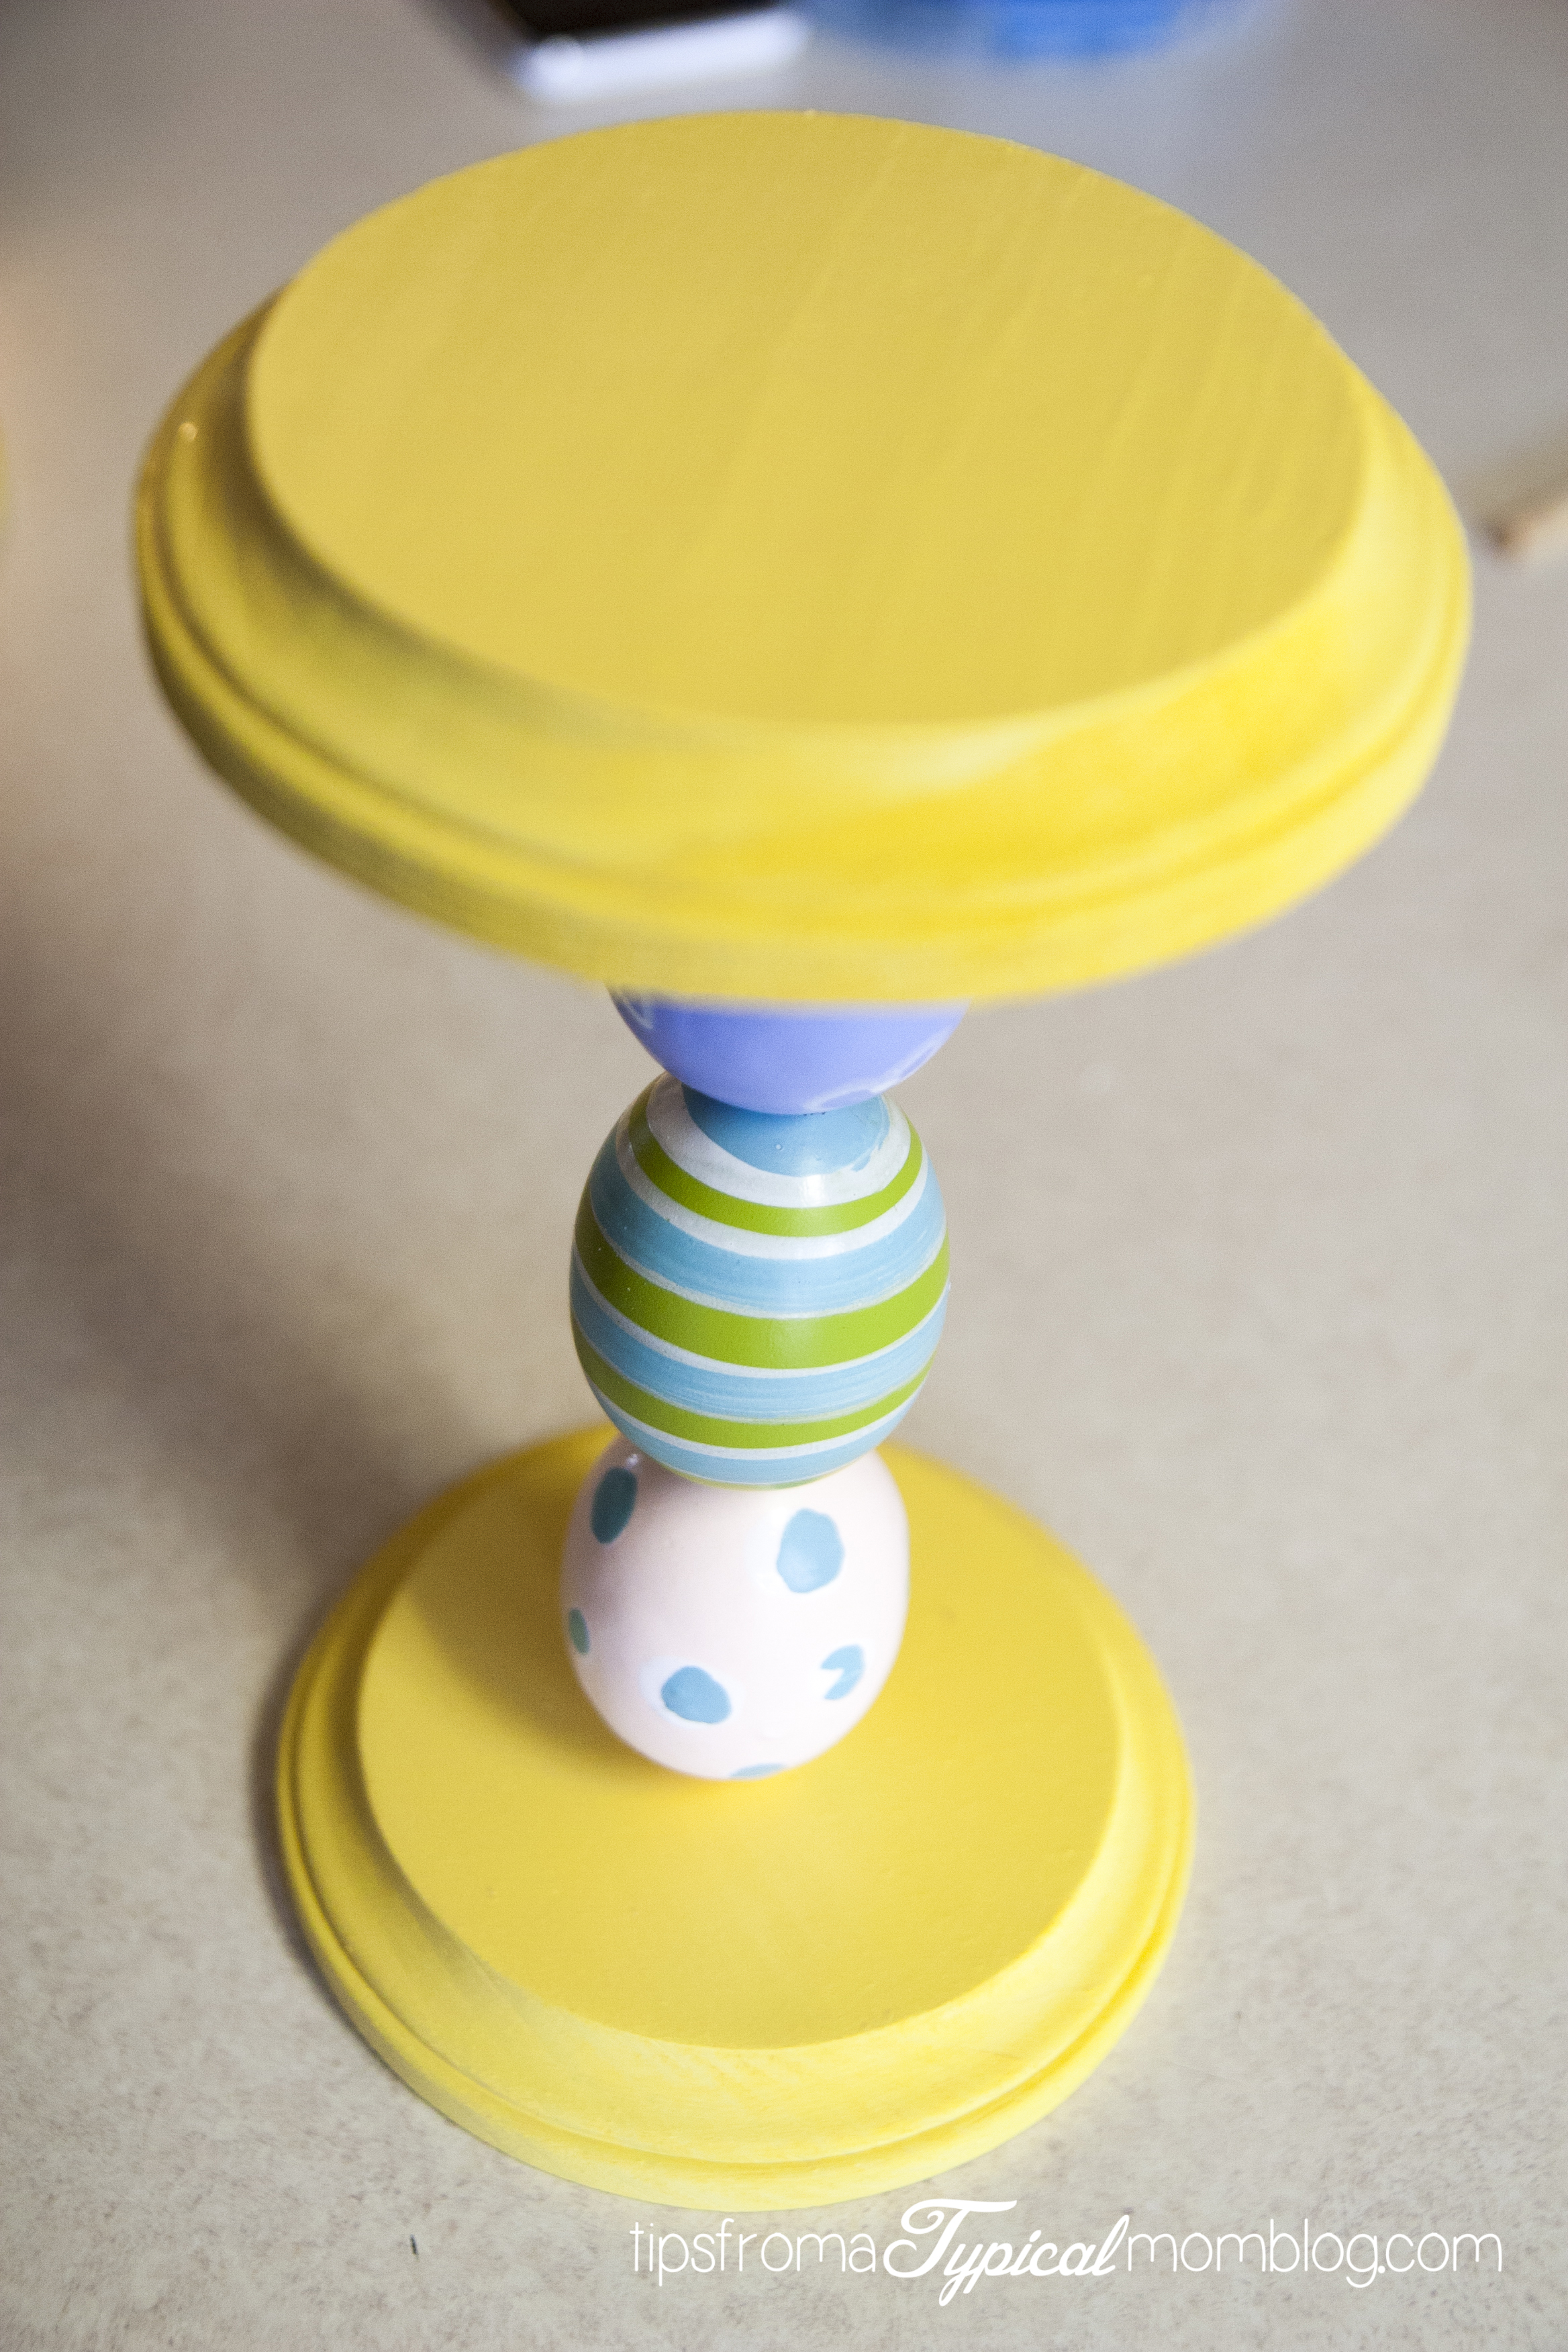
Here I used some cute blocks I had made at a Cricut Party!

DIY Easter Egg CandleSticks from Tips From a Typical Mom

DIY Easter Egg CandleSticks from Tips From a Typical Mom

DIY Easter Egg CandleSticks from Tips From a Typical Mom

Want some more fun projects to do that would match these? Check out this fun DIY Magnetic Key Holder, Easter Banner,
and these Re-purposed Tins.

 This project is linked up to the following linky parties:

Tatertots and Jello

Related

Comments | 10 comments

« Navajo Taco’s with Authentic Fry Bread
Moist Chocolate Cupcakes with Fresh Raspberry Whipped Cream Frosting »

Comments

  1. Emily @ Love, Pasta and a Tool Belt says

    April 2, 2014 at 7:21 pm

    These are so cute! I love them! Thank you for sharing at The Wednesday Round Up! We hope to see you back next week. I am going to share these on my Facebook page. http://facebook.com/LovePastaBlog

    Reply
  2. Carly says

    April 2, 2014 at 7:26 pm

    This is such a cute project!!

    Reply

Trackbacks

  1. DIY Easter Banner Craft says:
    April 4, 2014 at 3:46 pm

    […] DIY Easter Egg Candlesticks […]

    Reply
  2. The Wednesday Roundup #20 | says:
    April 9, 2014 at 4:01 am

    […] DIY Easter Egg Candlesticks by Tips from a Typical […]

    Reply
  3. The Wednesday Roundup #20 - The Princess & Her Cowboys says:
    April 9, 2014 at 4:01 am

    […] 3. DIY Easter Egg Candlesticks by Tips from a Typical Mom […]

    Reply
  4. The Wednesday Roundup Week 20 :: A Link Party says:
    April 9, 2014 at 11:05 am

    […] DIY Easter Egg Candlesticks by Tips from a Typical […]

    Reply
  5. Wednesday Roundup #20 - Savory Experiments says:
    April 9, 2014 at 5:46 pm

    […] DIY Easter Egg Candlesticks by Tips from a Typical […]

    Reply
  6. The Wednesday Roundup #20 and Twitter Link Up! - One TIPsy Chick says:
    April 14, 2014 at 1:18 pm

    […] DIY Easter Egg Candlesticks by Tips from a Typical […]

    Reply
  7. 15 Lovely and Unique Easter Crafts for You to Try | Interior Design Blogs says:
    March 27, 2015 at 11:54 am

    […] Craft These Cool Easter Egg Candlesticks Image via: tipsfromatypicalmomblog , […]

    Reply
  8. Amazing Interior Design 15 Lovely and Unique Easter Crafts for You to Try says:
    July 25, 2015 at 10:10 pm

    […] Craft These Cool Easter Egg Candlesticks Image via: tipsfromatypicalmomblog , […]

    Reply

Leave a Reply Cancel reply

Your email address will not be published. Required fields are marked *

Hi! I'm Annette Belnap. I'm a typical wife and mom to 5 kids ages 22, 21, 18, 16 and 10. I love to share family friendly recipes, parenting advice, cleaning and organizing tips and product reviews. I'm so glad you're here! Read more about my family and me.

Follow me on social media

  • Facebook
  • Instagram
  • LinkedIn
  • Pinterest
  • Twitter
  • YouTube

Search this site

Feminine Needs Delivered Monthly. Starting at $1.

Mexican Street Corn Salad- Family Friendly Side Dish

Easy Zesty Italian Pasta Sala

Easy Zesty Italian Pasta Salad Recipe

Connect with me

  • Facebook
  • Instagram
  • LinkedIn
  • Pinterest
  • Twitter
  • YouTube

Categories

Archives

Disclosure Policy and Terms of Use.

Copyright © 2023 · Tasteful theme by Restored 316

Copyright © 2023 · Tasteful Theme on Genesis Framework · WordPress · Log in